Wrapping a Fancy Ribbon around any Composable
How to animate a ribbon that wraps around UI elements in Jetpack Compose
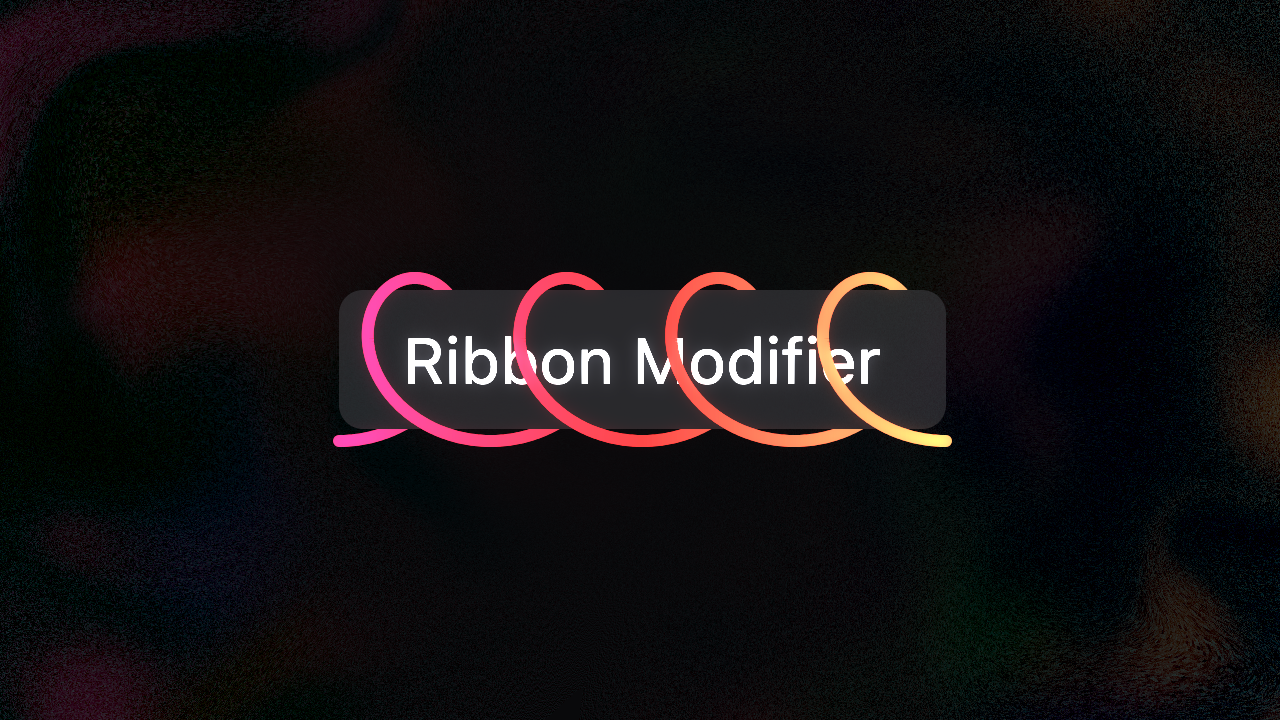
In this quick article, we will learn how to build a ribbon modifier that draws a path that wraps around any Compose UI element. This fancy effect can be used as a hover effect on a "hero button", or to call attention to a new action.
Final result of a modifier wrapping around a button
Drawing the Ribbon
Let's start with simply drawing a winding path. In a recent video, I went over using polar coordinates for defining paths.
I created the polarLineTo and polarMoveTo extension functions, that take in a degree, radius and origin, which are necessary to plot points in a polar coordinate space.
We can use these functions to draw a path that resembles a ribbon by giving it an increasing degree and moving origin.
private fun createRibbon(
    start: Offset,
    end: Offset,
    radius: Float,
    loops: Float = 5f,
    startAngle: Float = 90f,
    resolution: Int = 1000
): Path {
    val ribbon = Path()
    ribbon.moveTo(start)
    (0..resolution).forEach { i ->
        val t = i / resolution.toFloat()
        val min = min(startAngle, (360f * loops) - startAngle)
        val max = max(startAngle, (360f * loops) - startAngle)
        val degree = lerp(
            start = min,
            stop = max,
            fraction = t
        )
        if (i == 0) {
            ribbon.polarMoveTo(
                degrees = degree,
                distance = radius,
                origin = start
            )
        }
        ribbon.polarLineTo(
            degrees = degree,
            distance = radius,
            origin = lerp(
                start = start,
                stop = end,
                fraction = t,
            ),
        )
    }

    return ribbon
}
This function takes in the start and end point of the ribbon, plus other details like the radius of the arcs and how many loops to include, and returns a path that we can draw.
This function essentially drags a circle along the line, while plotting points along its circumference.
Illustration of a spiral path being drawn by a moving circle
Using this function, we can create a ribbon that matches the dimensions of any element, and then draw it.
val loops = loops - .5f // Trim the ribbon by 180º to cut the "tail"
val ribbonPath = createRibbon(
    start = Offset(0f, size.height * .5f),
    end = Offset(size.width, size.height * .5f),
    radius = (size.height * .5f) + stroke.toPx(),
    startAngle = -90f,
    loops = loops,
)
The start and end points would be the left and right edges of the view, respectively. And the radius would be half its height, plus some extra room for the stroke width. If you would like a vertical ribbon, flip these measurements.
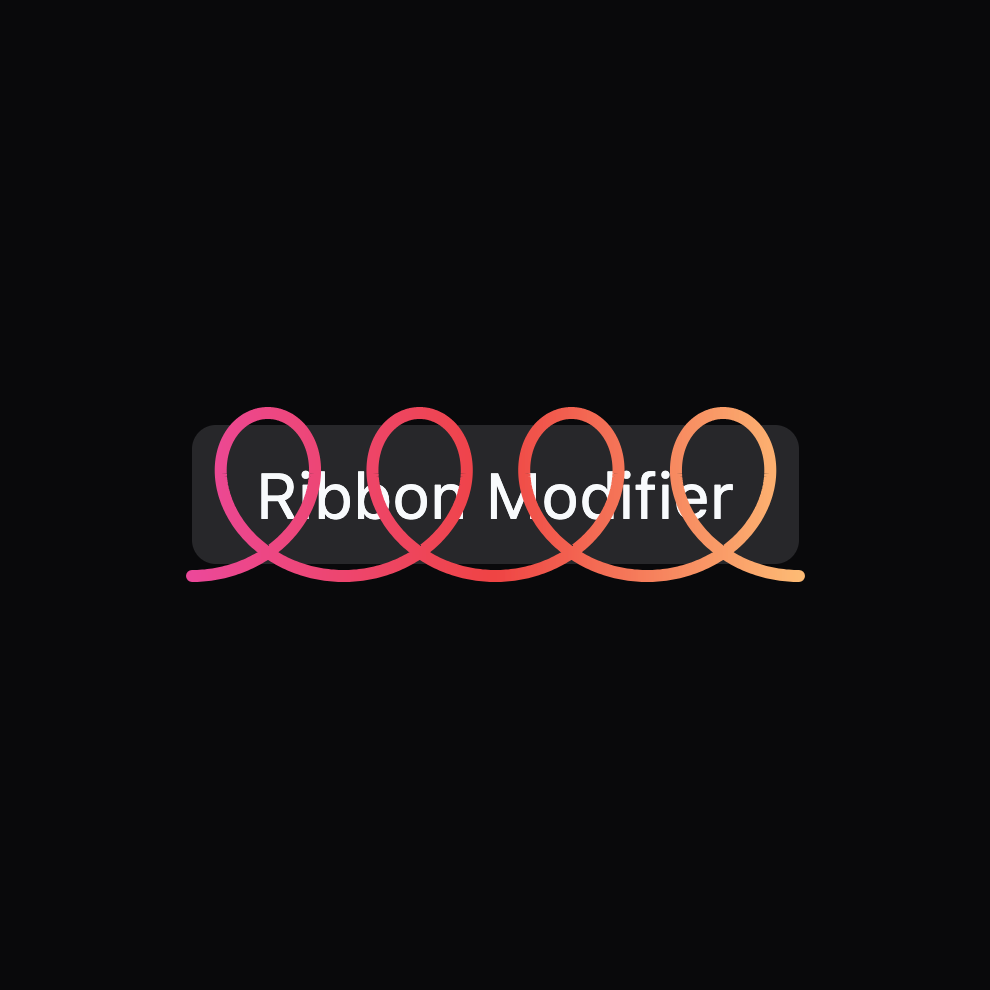
Drawing it over our element gives us the ribbon we want with the correct dimensions, but it's lacking depth. Let's try making it seem like the ribbon is wrapping around the button.
Adding Depth
As you can see, the secret to making this effect is splitting the path into two parts, and then drawing one portion above, and the other below the button.
One way we can do this is by splitting the path into segments that are sloping upwards and those that are sloping downwards.
val measure = PathMeasure()
measure.setPath(ribbonPath, false)

var isPositive = measure.getTangent(0f).y > 0f
val distanceArray = mutableListOf<Float>()
var segmentStartDistance = 0f

val resolution = 500
for (i in 0..resolution) {
    val t = i / resolution.toFloat()
    val distance = t * measure.length
    val tan = measure.getTangent(distance)
    val currentIsPositive = tan.y > 0f

    if (currentIsPositive != isPositive) {
        val segmentLength = distance - segmentStartDistance
        distanceArray.add(segmentLength)

        segmentStartDistance = distance
        isPositive = currentIsPositive
    } else if (i == resolution) {
        val segmentLength = distance - segmentStartDistance
        distanceArray.add(segmentLength)
    }
}
This code produces distanceArray, in which each item represents the length of a segment that entirely slopes upwards or downwards.
It does this by traversing the ribbon path and checking the tangent at each position. Then, it checks the y value of the tangent and checks if it changed from positive to negative.
Using this distanceArray we can draw the ribbon into parts inside a onDrawWithContent, which allows to define the z-depth of our content
onDrawWithContent {
	drawPath(
	    path = ribbonPath,
	    color = color,
	    style = Stroke(
	        width = stroke.toPx(),
	        pathEffect = PathEffect.dashPathEffect(
				intervals = distanceArray.toFloatArray(),
			),
	    )
	)

	drawContent()

	drawPath(
	    path = ribbonPath,
	    color = color,
	    style = Stroke(
	        width = stroke.toPx(),
	        pathEffect = PathEffect.dashPathEffect(
				intervals = distanceArray.toFloatArray(),
				phase = distanceArray.first()
			),
	    )
	)
}
We first draw the ribbonPath with the distanceArray applied as the intervals in a dash path effect. This will only draw the segments of the path that are sloping downwards.
Then we draw the content right in the middle using the drawContent function.
Finally we draw the segments that are sloping upwards. We still use the same distanceArray, but we set the phase to be the length of the first segment. This offsets the effect to only draw the remaining segments.
And with that, we can put all this logic into a neat modifier for us to apply anywhere we would need it.
You can find the full code below.
If you have any questions, or build something cool with this, please let me know below. Also if you have any thoughts or criticisms on the video, I would love to hear that as well.
Thanks for reading and good luck!
Ribbon Modifier Code
import androidx.compose.ui.Modifier
import androidx.compose.ui.draw.drawWithCache
import androidx.compose.ui.geometry.Offset
import androidx.compose.ui.graphics.Brush
import androidx.compose.ui.graphics.Path
import androidx.compose.ui.graphics.PathEffect
import androidx.compose.ui.graphics.PathMeasure
import androidx.compose.ui.graphics.StrokeCap
import androidx.compose.ui.graphics.StrokeJoin
import androidx.compose.ui.graphics.drawscope.Stroke
import androidx.compose.ui.unit.Dp
import androidx.compose.ui.unit.dp
import androidx.compose.ui.util.lerp
import kotlin.math.PI
import kotlin.math.cos
import kotlin.math.max
import kotlin.math.min
import kotlin.math.sin


private fun Modifier.ribbon(
    brush: Brush,
    stroke: Dp = 4.dp,
    loops: Int = 7,
    progress: Float = 1f,
): Modifier {
    return drawWithCache {
        val loops = loops - .5f
        val ribbonPath = createRibbon(
            start = Offset(0f, size.height * .5f),
            end = Offset(size.width, size.height * .5f),
            radius = (size.height * .5f) + stroke.toPx(),
            startAngle = -90f,
            loops = loops,
        )

        val measure = PathMeasure()
        measure.setPath(ribbonPath, false)

        var isPositive = measure.getTangent(0f).y > 0f
        val distanceArray = mutableListOf<Float>()
        var segmentStartDistance = 0f

        val resolution = 500
        for (i in 0..resolution) {
            val t = i / resolution.toFloat()
            val distance = t * measure.length
            val tan = measure.getTangent(distance)
            val currentIsPositive = tan.y > 0f

            if (currentIsPositive != isPositive) {
                val segmentLength = distance - segmentStartDistance
                distanceArray.add(segmentLength)

                segmentStartDistance = distance
                isPositive = currentIsPositive
            } else if (i == resolution) {
                val segmentLength = distance - segmentStartDistance
                distanceArray.add(segmentLength)
            }
        }

        onDrawWithContent {
            if (progress > 0f)
                drawPath(
                    path = ribbonPath,
                    brush = brush,
                    style = Stroke(
                        width = stroke.toPx(),
                        cap = StrokeCap.Round,
                        join = StrokeJoin.Round,
                        pathEffect = PathEffect.chainPathEffect(
                            PathEffect.dashPathEffect(
                                intervals = distanceArray.toFloatArray(),
                            ),
                            PathEffect.dashPathEffect(
                                intervals = floatArrayOf(
                                    measure.length * progress,
                                    measure.length,
                                )
                            )
                        )
                    )
                )

            drawContent()

            if (progress > 0f)
                drawPath(
                    path = ribbonPath,
                    brush = brush,
                    style = Stroke(
                        width = stroke.toPx(),
                        cap = StrokeCap.Round,
                        join = StrokeJoin.Round,
                        pathEffect = PathEffect.chainPathEffect(
                            PathEffect.dashPathEffect(
                                intervals = distanceArray.toFloatArray(),
                                phase = distanceArray.first()
                            ),
                            PathEffect.dashPathEffect(
                                intervals = floatArrayOf(
                                    measure.length * progress,
                                    measure.length,
                                )
                            )
                        )
                    )
                )
        }
    }
}


private fun createRibbon(
    start: Offset,
    end: Offset,
    radius: Float,
    startAngle: Float = 90f,
    loops: Float = 5f,
    resolution: Int = 1000
): Path {
    val ribbon = Path()
    ribbon.moveTo(start)
    (0..resolution).forEach { i ->
        val t = i / resolution.toFloat()
        val min = min(startAngle, (360f * loops) - startAngle)
        val max = max(startAngle, (360f * loops) - startAngle)
        val degree = lerp(
            start = min,
            stop = max,
            fraction = t
        )
        if (i == 0) {
            ribbon.polarMoveTo(
                degrees = degree,
                distance = radius,
                origin = start
            )
        }
        ribbon.polarLineTo(
            degrees = degree,
            distance = radius,
            origin = androidx.compose.ui.geometry.lerp(
                start = start,
                stop = end,
                fraction = t,
            ),
        )
    }
    return ribbon
}

private fun Path.polarMoveTo(
    degrees: Float,
    distance: Float,
    origin: Offset = Offset.Zero
) = moveTo(polarToCart(degrees, distance, origin))


private fun Path.polarLineTo(
    degrees: Float,
    distance: Float,
    origin: Offset = Offset.Zero
) = lineTo(polarToCart(degrees, distance, origin))

private fun polarToCart(
    degrees: Float,
    distance: Float,
    origin: Offset = Offset.Zero
): Offset = Offset(
    x = distance * cos(-degrees * (PI / 180)).toFloat(),
    y = distance * sin(-degrees * (PI / 180)).toFloat(),
) + origin
Subscribe for UI recipes