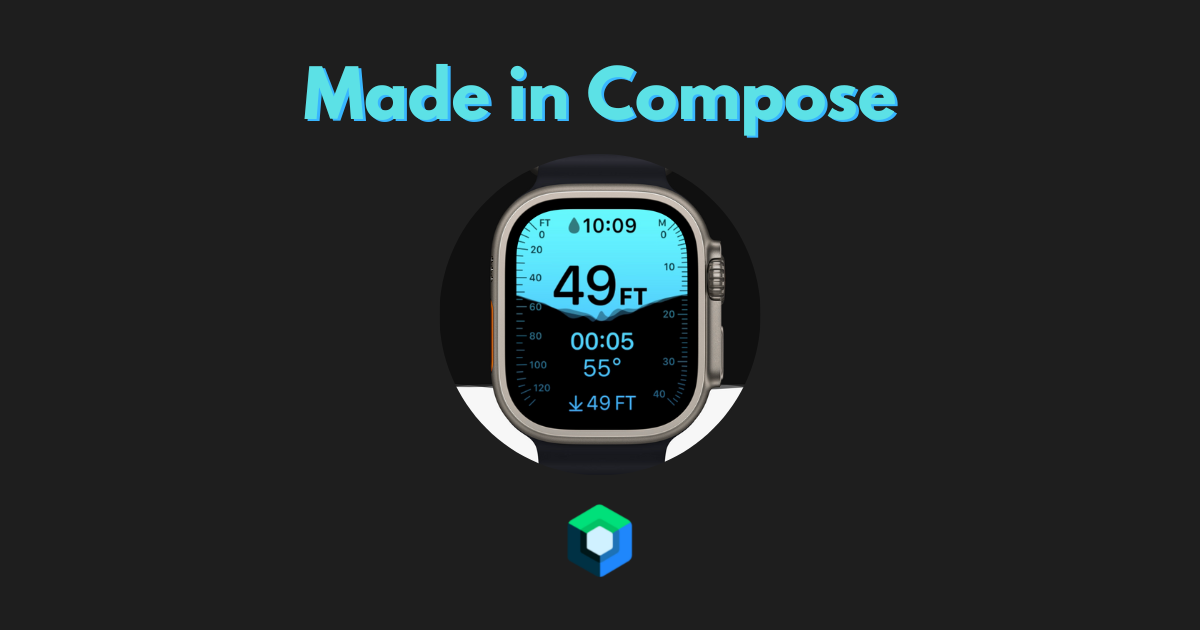
Made in Compose - Apple watch ultra water level animation
Welcome to the first post in my Made in Compose series where I attempt recreating UI and animations, in Jetpack Compose and share my process.
In this first post, I will be recreating the water level animation in the new Apple Watch Ultra diving app.
This was one of the standout animations for me (other than the dynamic island) from the Apple keynote. It's such a simple animation by appearance that conveys information and looks stunning.
Choosing my canvas
First things first, I had to decide what to use for laying out my elements on screen. Unfortunately, plain composables do not offer a lot of customization when it comes to drawing them on screen in regards to blend modes. I chose to use the Canvas composable and draw the elements there and have access to drawing of complex paths along with tweaking their blend modes.
Drawing text
In the Canvas composable, there is sadly no direct way to draw text on-screen. To solve this, I used the Canvas view interop to use its drawText function.
Canvas(
    onDraw = {
		val paint = Paint().asFrameworkPaint()
		paint.apply {
		    isAntiAlias = true
		    color = android.graphics.Color.parseColor("#41E0E0")
		    textAlign = android.graphics.Paint.Align.CENTER
		}

		drawIntoCanvas {
		    it.nativeCanvas.apply {
		        drawText(text, x, y, paint)
		    }
		}
	}
)
Animating waves
Canvas allows us to draw various paths on screen. After testing a couple of variations, the one with the best result was the cubic path using the cubicTo function.
A cubic path is defined by four points. A starting and ending point, and two control points for each of these.
My cubic path is defined by a function that takes in an arbitrarily sized list of y positions and distributes them evenly across the width of the canvas. I then calculate the control points based on the previous points calculated.
Path().apply {
    moveTo(0f, 0f)
    lineTo(0f, animatedY)
    val interval = size.width * (1 / (aYs.size + 1).toFloat())
    aYs.forEachIndexed { index, y ->
        val segmentIndex = (index + 1) / (aYs.size + 1).toFloat()
        val x = size.width * segmentIndex
        cubicTo(
            x1 = if (index == 0) 0f else x - interval / 2f,
            y1 = aYs.getOrNull(index - 1)?.toFloat() ?: currentY,
            x2 = x - interval / 2f,
            y2 = y.toFloat(),
            x3 = x,
            y3 = y.toFloat(),
        )
    }

    cubicTo(
        x1 = size.width - interval / 2f,
        y1 = aYs.last().toFloat(),
        x2 = size.width,
        y2 = animatedY,
        x3 = size.width,
        y3 = animatedY,
    )
    lineTo(size.width, 0f)
    close()
}
Blend modes
In the animation by Apple, you will notice that only the parts of the text that are covered by the wave are the ones that switch colors. To achieve this, we will use blend modes in our canvas. Blend modes allow us to manipulate the elements on the .
For an overview of all the available blend modes, look here.
In this animation, BlendMode.Xor gives us the effect we are after.
So for the gradation lines on the sides, I applied this blend mode like this:
drawLine(
    start = Offset(0f, y),
    end = Offset(lineWidth, y),
    brush = Brush.verticalGradient(
        colors = listOf(
            Color(0xFF41E0E0),
            Color(0xFF279ED5),
        )
    ),
    blendMode = BlendMode.Xor,  <----
    strokeWidth = strokeWidth,
)
And for the text, I had to use the blend modes compatible with the old Canvas.
val paint = Paint().asFrameworkPaint()
paint.apply {
    isAntiAlias = true
    textSize = 100.sp.toPx()
    typeface = Typeface.create(Typeface.DEFAULT, Typeface.BOLD)
    color = android.graphics.Color.parseColor("#41E0E0")
    textAlign = android.graphics.Paint.Align.CENTER
    blendMode = android.graphics.BlendMode.XOR  <----
}
Both of these will give us the same result in the end.
One small caveat with using blend modes in Compose: I had to put this line in before I could get the effect working.
Canvas(
    modifier = Modifier
        .graphicsLayer(alpha = 0.99f)  <----
        .fillMaxSize(),
    onDraw = {
	    ...
With all this, I was able to create a basic version of the water animation. Here is my final result:
Full code for the composable is available here.
This was the first article of what I am planning to be a series of recreations in compose. If you have any UI or animation idea that would be cool to do in compose, let me know on twitter.
Thanks for reading and good luck!
Subscribe for UI recipes