How to create Dials in Jetpack Compose
Introducing ChromaDial, a library for building delightful dials
ChromaDial is my new library that helps you create Dials that are beautiful, easy and custom tailored to your needs.
In this article, I will go over how to set up a basic Dial in your app.
Note: This library is still in alpha, and the API is still not final
Adding a Dial
First, add the dependency into your project.
implementation("com.sinasamaki:chroma-dial:1.0.0-Alpha4")Then, we can simply call Dial and pass in its required parameters.
var degree by remember { mutableStateOf(0f) }
Dial(
	degree = degree,
	onDegreeChanged = { degree = it },
)
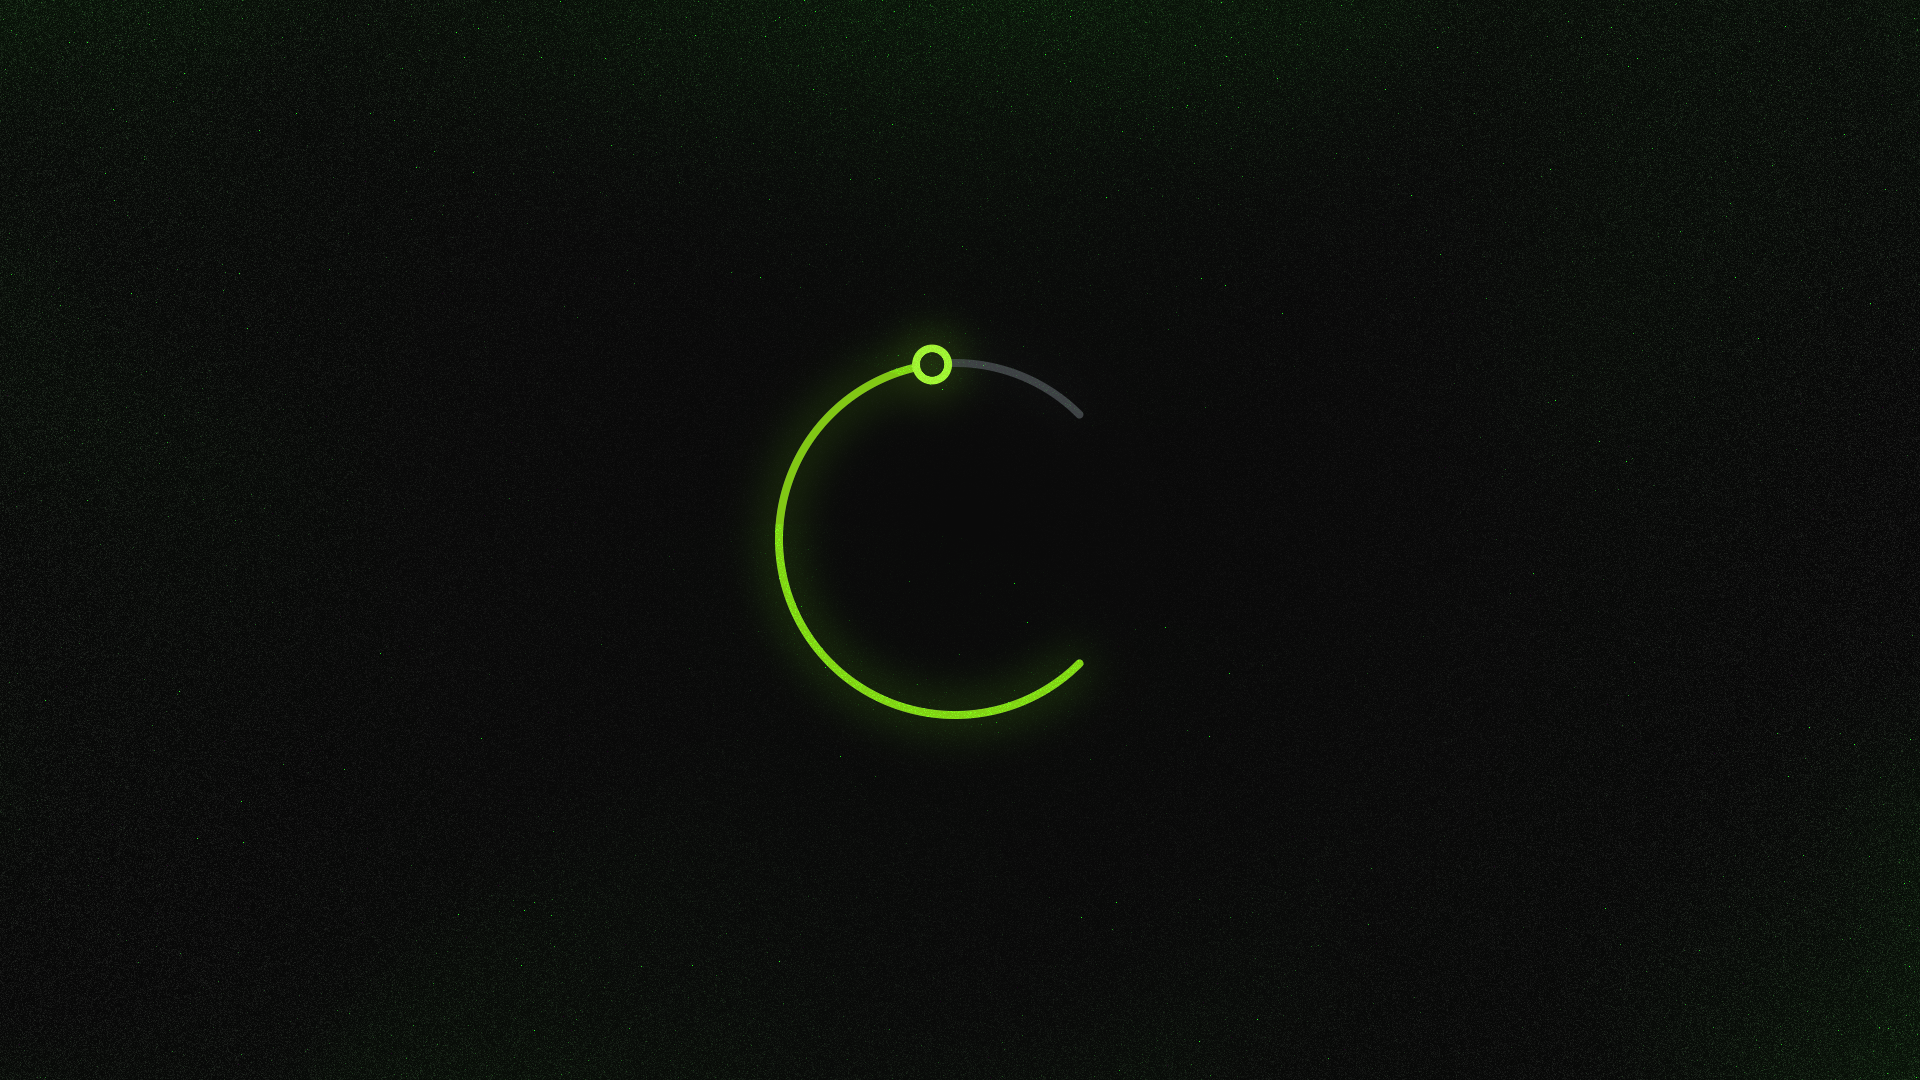
Dial works similarly to the normal Slider, but takes in a degree state instead. This will be the degree representing where on the dial, the current value is at. 0 degrees starts from the 12 o'clock position, and increases clockwise.
The lambda function passed in onDegreeChanged is where we can set our degree state.
If the value of this Dial is used in an expensive operation, like saving to disk, then you would not want to perform this task in onDegreeChanged, since this would be called multiple times a second as the user moves the thumb.
In this case, you would call your operation in onDegreeChangeFinished, which is only called once the user lifts their finger after moving the dial.
var degree by remember { mutableStateOf(0f) }
Dial(
	degree = degree,
	onDegreeChanged = { degree = it },
	onDegreeChangeFinished = { saveValueToDisk(degree) },
)
Dial Range
The default range of the dial runs from 0º to 360º. But we can change this to be any range we desire.
var degree by remember { mutableStateOf(0f) }
Dial(
	degree = degree,
	onDegreeChanged = { degree = it },
	startDegrees = 225f,
	sweepDegrees = 270f,
)
We set the range by first picking the starting point using startDegrees. Then we define how many degrees the dial will cover using sweepDegrees.
So far, we have only seen a dial that do not go above 360º. But if you need to, you can go beyond this, and the default track will add rings around the dial to symbolize the number of full revolutions.
var degree by remember { mutableStateOf(0f) }
Dial(
	degree = degree,
	onDegreeChanged = { degree = it },
	startDegrees = 0f,
	sweepDegrees = 1440f,
)
Interval Snapping
If we need a dial with discreet steps, we can set the interval to define snapping points after a certain amount of degrees. By default, this is set to 0, making the dial smooth with no snapping point.
var degree by remember { mutableStateOf(0f) }
Dial(
	degree = degree,
	onDegreeChanged = { degree = it },
	interval = 30f
)
If we set this to 30f, we will have a snapping point every 30º like this:
As you can see above, the default dial track will add ticks after the specified amount of degrees for us, and the dial thumb will automatically snap to them.
Another option is to divide 360º by the amount of divisions we need.
var degree by remember { mutableStateOf(0f) }
Dial(
	degree = degree,
	onDegreeChanged = { degree = it },
	interval = 360f / 60
)
This can be used for a dial that is setting the time, and we want it to snap to exact minutes or seconds.
Until next time...
In this article, we covered the default dial provided by ChromaDial.
Beyond the default, we can also define and customize the track and thumb.
Next article will dive deeper on how we can create unique Dials.
Subscribe to be the first to read it.
ChromaDial is fully open source, so feel free to go explore the code further. If you find any bugs, or have feature requests, just create an issue on GitHub.
Thanks for reading and good luck!
Subscribe for UI recipes