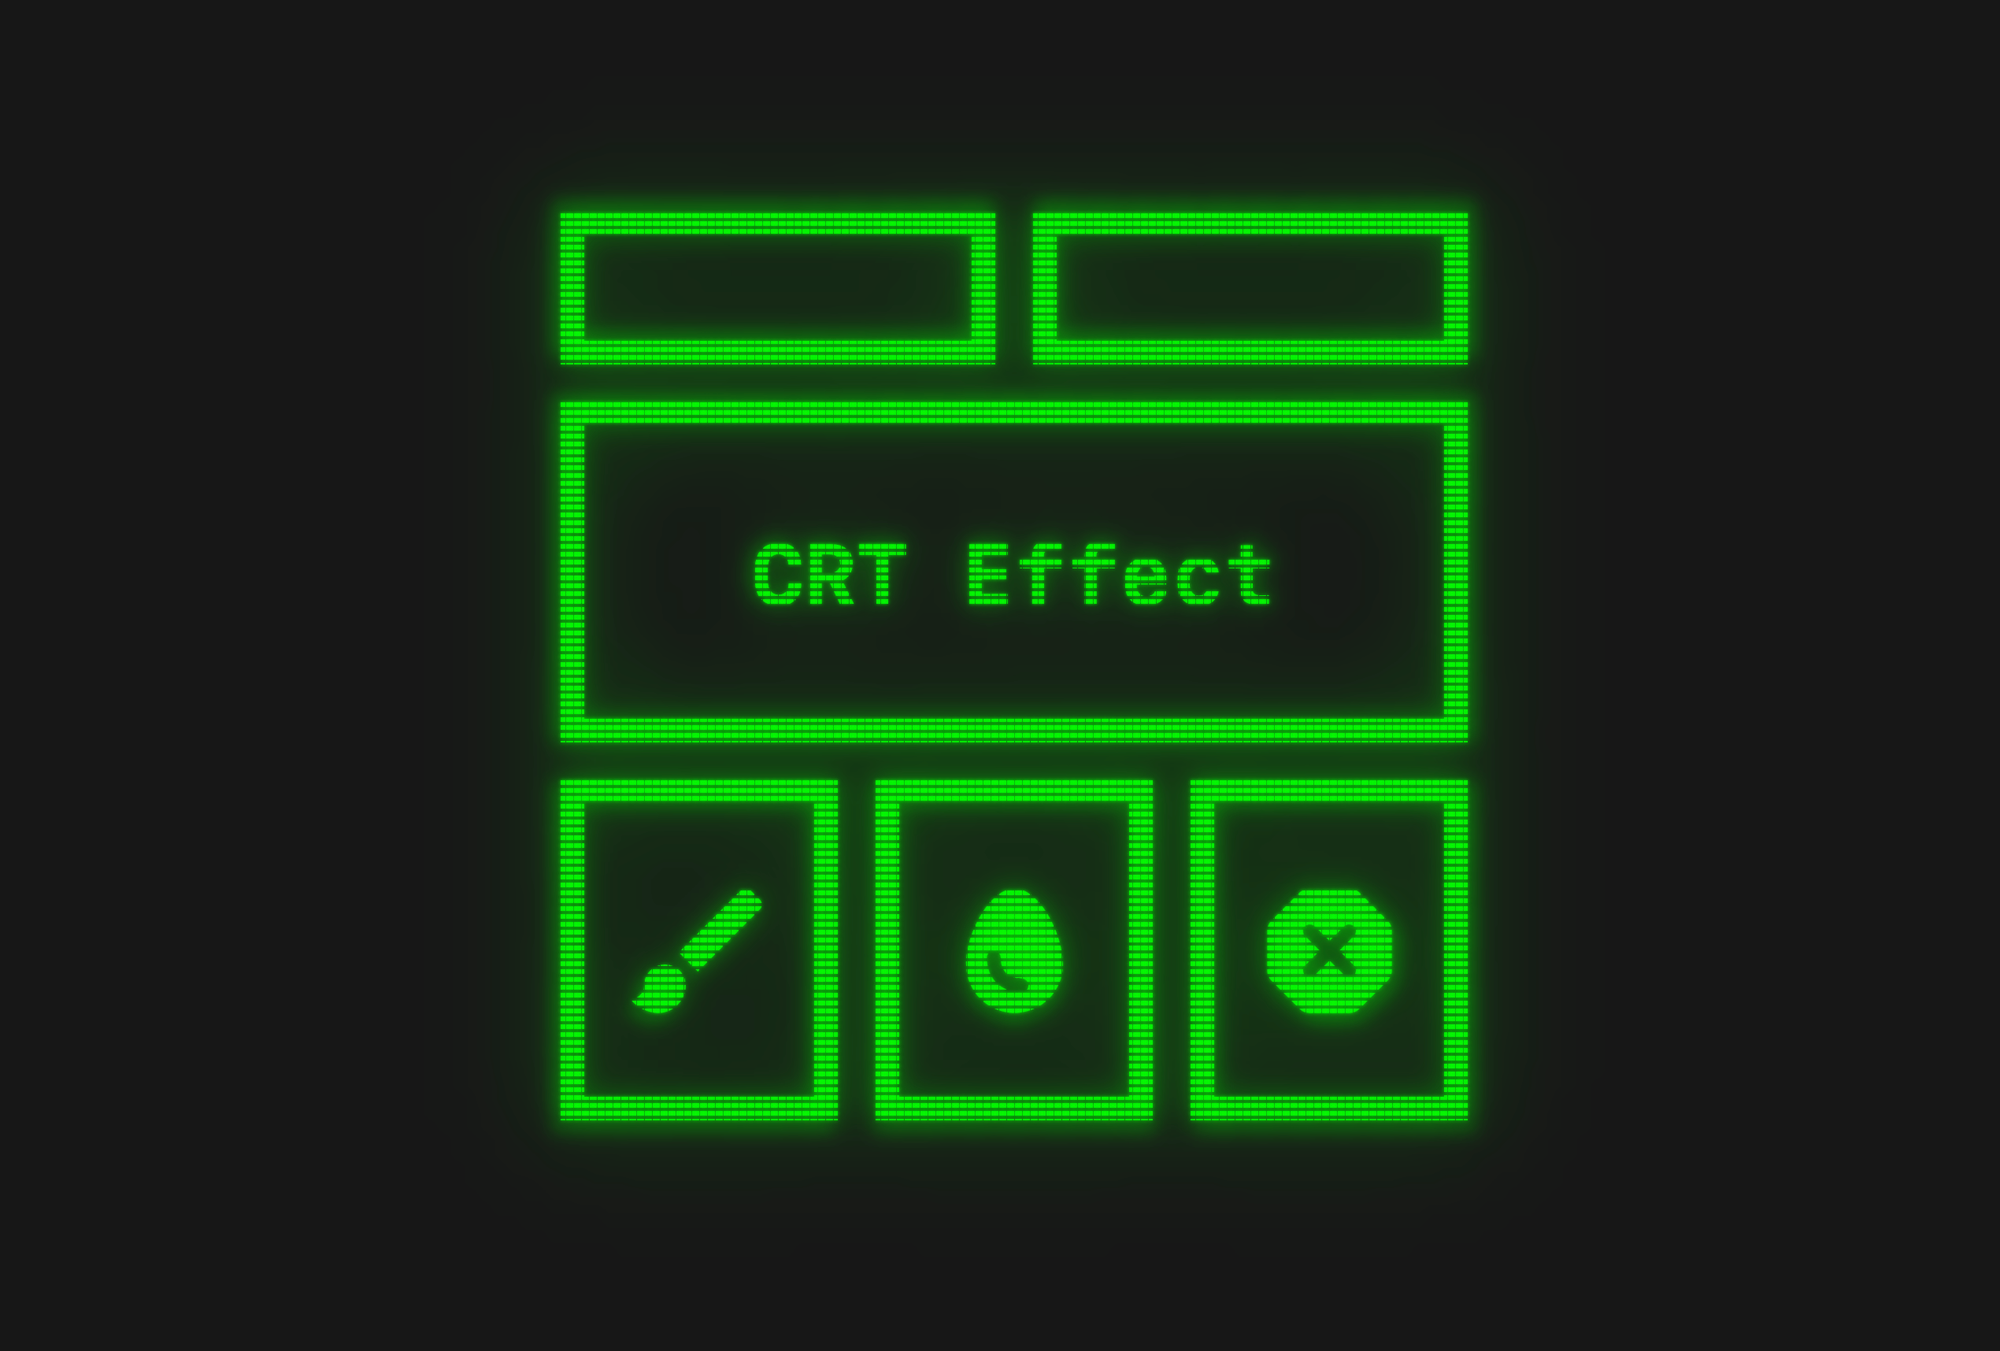
Creating a CRT Screen Effect in Jetpack Compose
Using graphics layer, gradients and blur to create this nostalgic effect
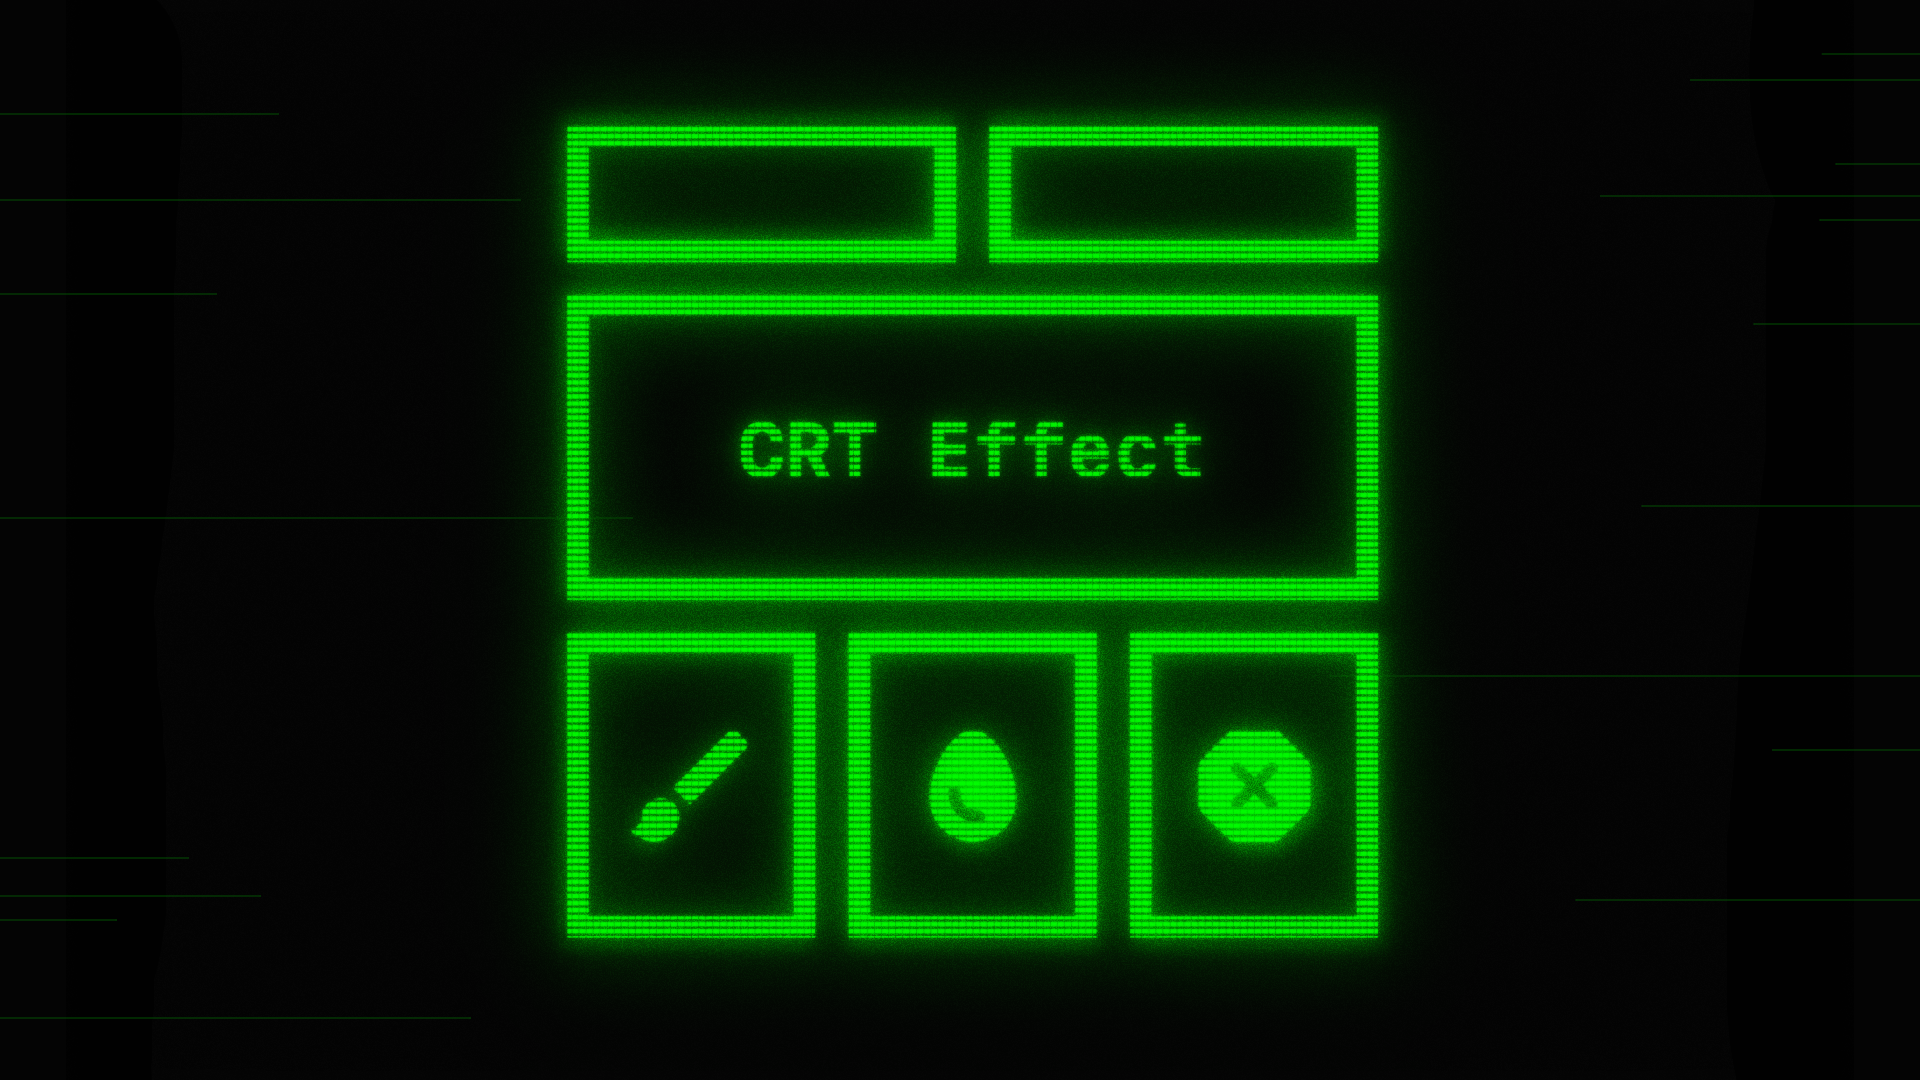
CRT monitors have a distinct and nostalgic look: blurred edges, scan lines, slight color bleeding. Let's try to recreate this effect in Jetpack Compose using GraphicsLayer and some clever layering.
GraphicsLayer
Like the last article, the foundation of this effect is GraphicsLayer. It lets us draw our content once on an offscreen buffer. Then we can redraw it multiple times with different effects, at little performance cost.
val graphicsLayer = rememberGraphicsLayer()

Box(Modifier.drawWithContent {
    graphicsLayer.record {
        this@drawWithContent.drawContent()
    }
}) {
    content()
}
Once our content is recorded in graphicsLayer, we can draw it as many times as we want using drawLayer(graphicsLayer).
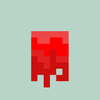
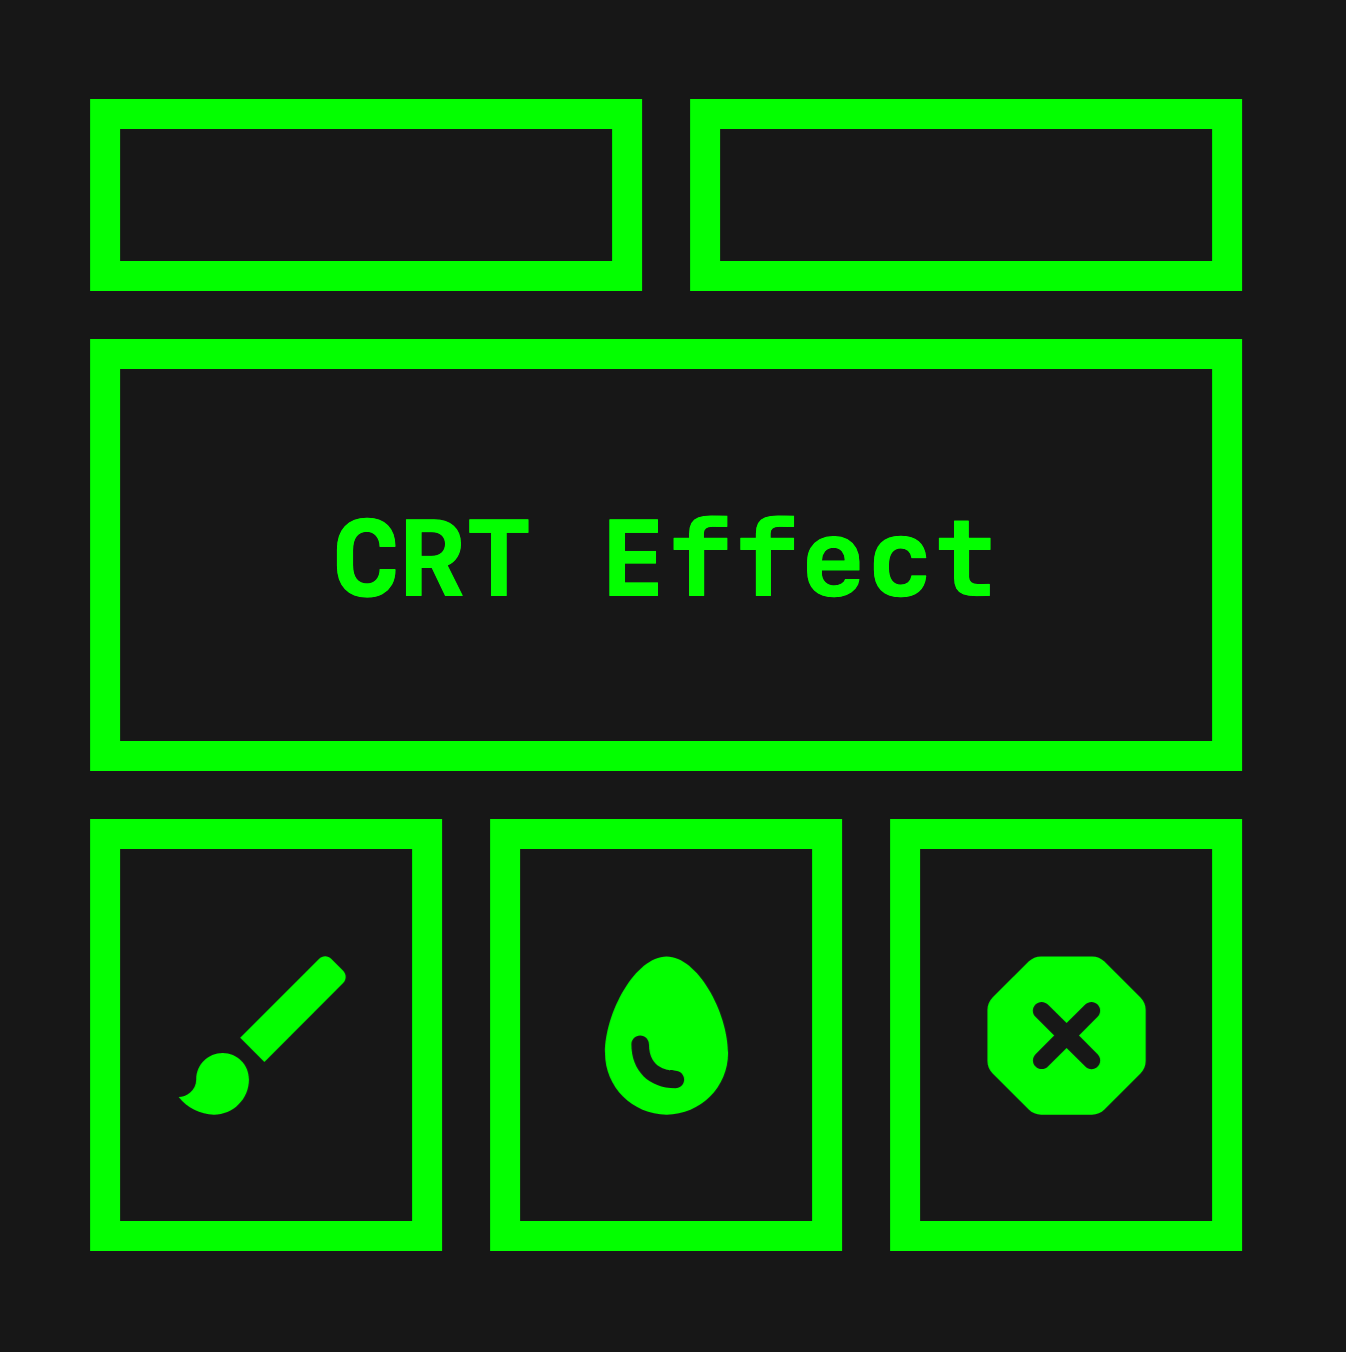
I like using this effect with bright saturated content over a black background. Here is the base composable that we will apply the effect on.
Adding Scanlines
To simulate the horizontal scanlines on a CRT monitor, we will use repeated gradients. Let's put it in an extension function like this:
private fun DrawScope.drawScanLines(alpha: Float, blendMode: BlendMode) {
    val color = Colors.Black.copy(alpha = alpha)
    drawRect(
        brush = Brush.verticalGradient(
            0f to color,
            0.4f to color,
            0.4f to Colors.Transparent,
            1f to Colors.Transparent,
            tileMode = TileMode.Repeated,
            startY = 0f,
            endY = 10f,
        ),
        blendMode = blendMode
    )
    drawRect(
        brush = Brush.horizontalGradient(
            0f to color,
            0.1f to color,
            0.1f to Colors.Transparent,
            1f to Colors.Transparent,
            tileMode = TileMode.Repeated,
            startX = 0f,
            endX = 10f,
        ),
        blendMode = blendMode
    )
}
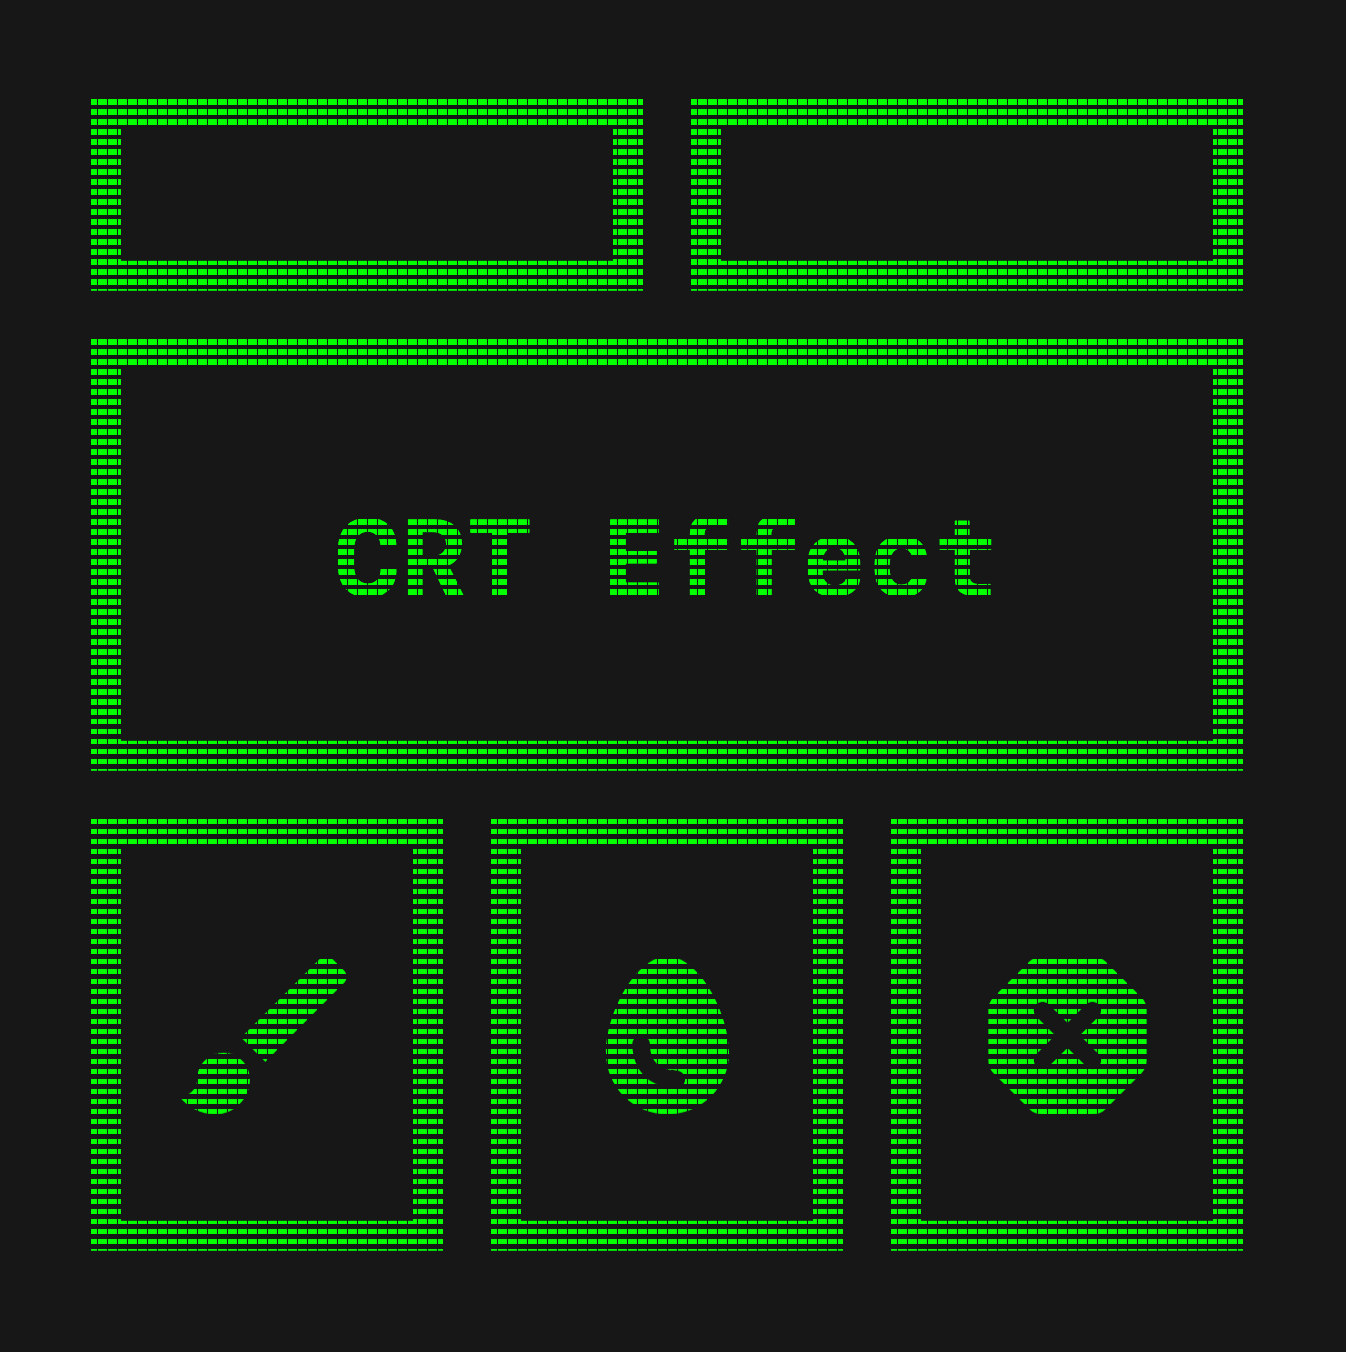
We manually define the color stops so that we have a sharp edge between colors and then set the tileMode to Repeated. This, along with a short start and end point, will give us many repeated parallel lines.
The extension function also takes in our desired opacity and BlendMode.
We can then use this function to draw the scanlines over our graphicsLayer.
.drawBehind {
    layer {
        drawLayer(graphicsLayer)
        drawScanLines(alpha = 1f, blendMode = BlendMode.DstOut)
    }
}
Setting this to a blend mode of DstOut "subtracts" our gradient from the drawn content, giving us this effect.
Building the Blur Layers
For the glow that CRT screens usually have, we will draw our graphicsLayer multiple times, each with different blur radius, alpha and scale, respectively.
val blurLayers = remember {
    listOf(
        Triple(1.dp, 0.2f, 1.02f to 1.03f),
        Triple(0.dp, .2f, 1f to 1f),
        Triple(1.dp, 0.9f, 1f to 1f),
        Triple(10.dp, 1f, 1f to 1f),
        Triple(40.dp, 1f, 1f to 1f),
    )
}
We will use a list of Triples to store the data of each layer. The order of this list also defines their draw order. I would suggest you play around with this values and ordering in order to get the effect you desire. But this is what worked in my case.
blurLayers.forEach { (blur, alpha, scale) ->
    Box(
        Modifier
            .matchParentSize()
            .blur(blur, BlurredEdgeTreatment.Unbounded)
            .graphicsLayer {
                scaleX = scale.first
                scaleY = scale.second
                this.alpha = alpha
            }
            .drawBehind {
                layer {
                    drawLayer(graphicsLayer)
                    drawScanLines(alpha = 1f, blendMode = BlendMode.DstOut)
                }
            }
    )
}
Then we draw each layer using the values in the list. Above our drawBehind modifier, we set the size to match our parent, and apply the blur, scale and alpha. Remember to set the blur as Unbounded so that it extends beyond the bounds of the containing composable.
Screen Jitter
Finally, let's apply a screen shake, in order to mimic the characteristic jitter of CRT screens. We can do this by creating an Offset that we update with a random float value between -1 and 1.
var shake by remember { mutableStateOf(Offset.Zero) }

LaunchedEffect(Unit) {
    while (true) {
        shake = Offset(
            Random.nextInt(-1, 1) * Random.nextFloat(),
            Random.nextInt(-1, 1) * Random.nextFloat(),
        )
        delay(32)
    }
}
This is done here simply inside a while loop. The delay can be adjusted to control the interval rate of the flickering.
modifier = modifier
    .graphicsLayer {
        translationX = shake.x
        translationY = shake.y
    }
This offset can then be applied using a modifier.
Putting it all together
Let's assemble all this together into a composable that we can easily use. It will take in the content plus the flickerDelay that will control the rate of the flickering.
@Composable
fun CRTBox(
    modifier: Modifier = Modifier,
    flickerDelay: Int = 32,
    xSize: Float = 10f,
    ySize: Float = 10f,
    content: @Composable () -> Unit,
) {
    var shake by remember { mutableStateOf(Offset.Zero) }

    LaunchedEffect(Unit) {
        while (flickerDelay > 0) {
            shake = Offset(
                Random.nextInt(-1, 1) * Random.nextFloat(),
                Random.nextInt(-1, 1) * Random.nextFloat(),
            )
            delay(flickerDelay.toLong())
        }
    }

    val graphicsLayer = rememberGraphicsLayer()

    Box(
        modifier = modifier
            .graphicsLayer {
                translationX = shake.x
                translationY = shake.y
            }
    ) {
        Box(Modifier.drawWithContent {
            graphicsLayer.record { this@drawWithContent.drawContent() }
        }) {
            content()
        }

        val blurLayers = remember {
            listOf(
                Triple(5.dp, .3f, 1.02f to 1.03f),
                Triple(0.dp, .8f, 1f to 1f),
                Triple(1.dp, .9f, 1f to 1f),
                Triple(10.dp, .6f, 1.001f to 1f),
                Triple(40.dp, .7f, 1f to 1f),
            )
        }

        blurLayers.forEach { (blur, alpha, scale) ->
            Box(
                Modifier
                    .matchParentSize()
                    .blur(blur, BlurredEdgeTreatment.Unbounded)
                    .graphicsLayer {
                        scaleX = scale.first
                        scaleY = scale.second
                        this.alpha = alpha
                    }
                    .drawBehind {
                        layer {
                            drawLayer(graphicsLayer)
                            drawScanLines(
                                alpha = 1f,
                                xSize = xSize,
                                ySize = ySize,
                                blendMode = BlendMode.DstOut,
                            )
                        }
                    }
            )
        }
    }}

private fun DrawScope.layer(
    bounds: Rect = size.toRect(),
    block: DrawScope.() -> Unit
) =
    drawIntoCanvas { canvas ->
        canvas.withSaveLayer(
            bounds = bounds,
            paint = Paint(),
        ) { block() }
    }

private fun DrawScope.drawScanLines(
    alpha: Float,
    xSize: Float,
    ySize: Float,
    blendMode: BlendMode
) {
    val color = Colors.Black.copy(alpha = alpha)
    if (ySize != 0f) {
        drawRect(
            brush = Brush.verticalGradient(
                0f to color,
                0.4f to color,
                0.4f to Colors.Transparent,
                1f to Colors.Transparent,
                tileMode = TileMode.Repeated,
                startY = 0f,
                endY = ySize,
            ),
            blendMode = blendMode
        )
    }

    if (xSize != 0f) {
        drawRect(
            brush = Brush.horizontalGradient(
                0f to color,
                0.1f to color,
                0.1f to Colors.Transparent,
                1f to Colors.Transparent,
                tileMode = TileMode.Repeated,
                startX = 0f,
                endX = xSize,
            ),
            blendMode = blendMode
        )
    }
}
You can then use it like any other composable:
CRTBox {
    Text("GAME OVER")
}
Sweeper update
If you would like to see this in action, check it out in the latest Sweeper update that uses the CRT effect to create a creepy Halloween theme.
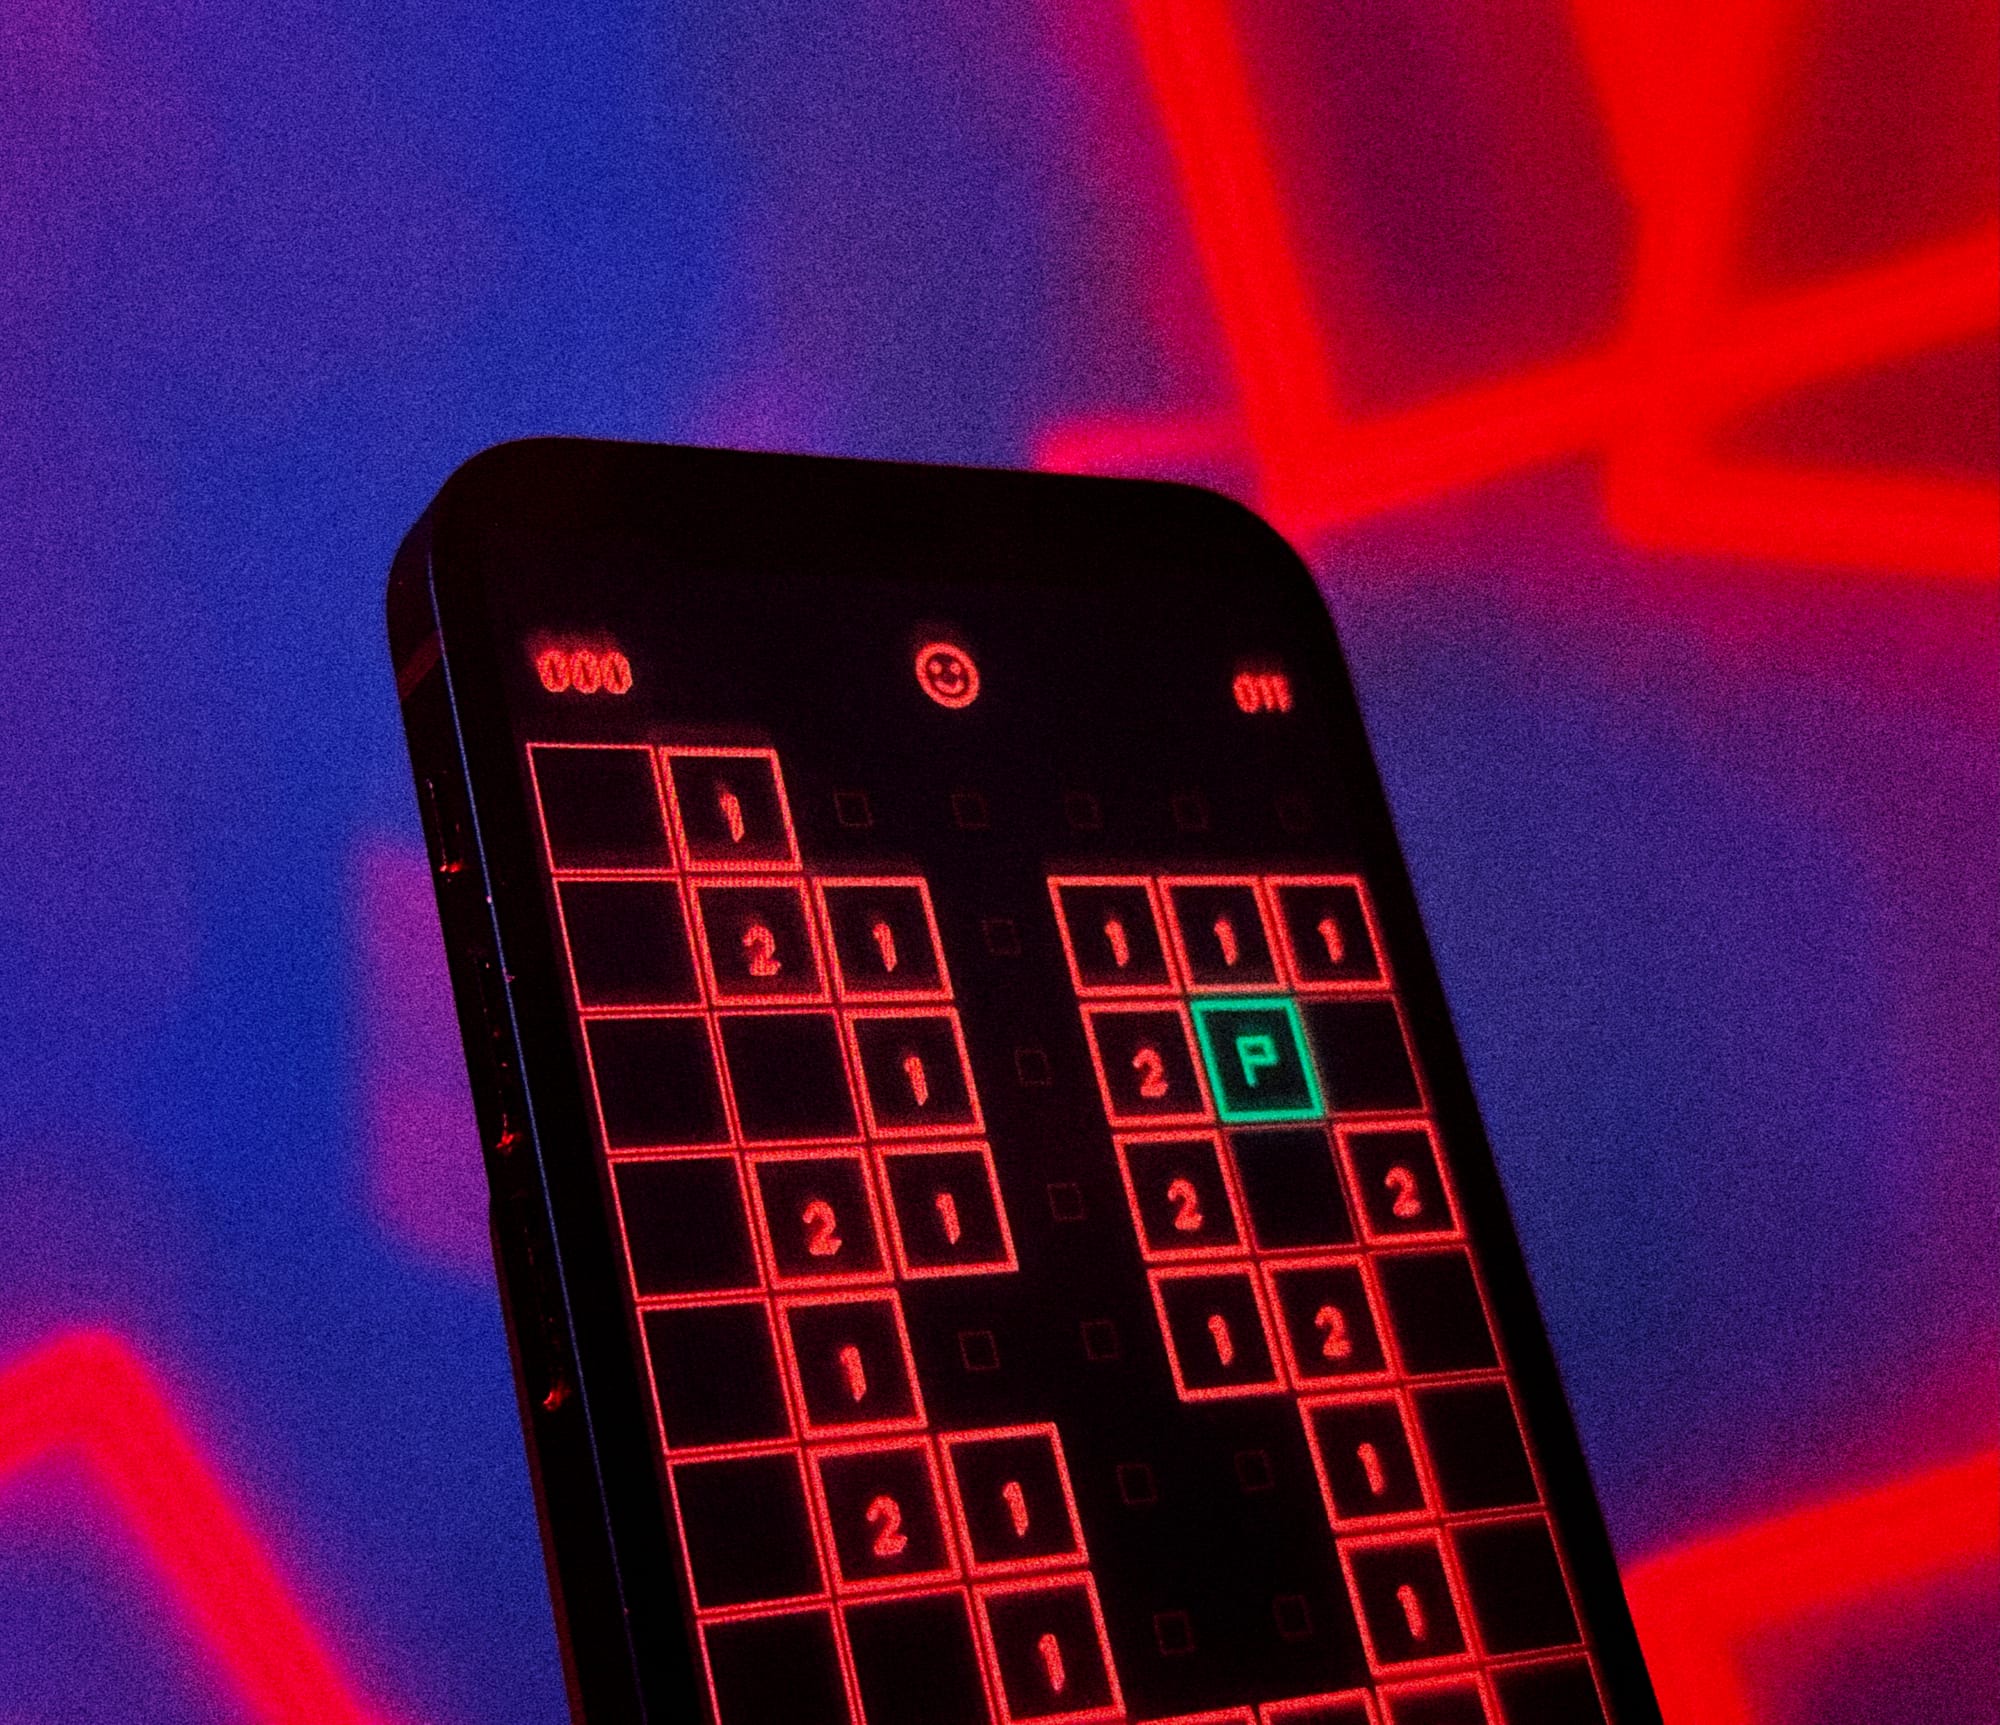
https://play.google.com/store/apps/details?id=com.sinasamaki.chroma.sweeper
https://apps.apple.com/us/app/sweeper-by-sinasamaki/id6752220495
Thanks for reading and good luck!
Subscribe for UI recipes