Automating beautiful Screenshots using Jetpack compose

Screenshots are the first impression of the user on our app. Therefore, to put our best foot forward, we need the best designed screenshots to be presented. But graphically designing screenshots is time-consuming. After coming up with a unique design, you still need to apply it to apply to all variants of your app. That can be phones or tablets, multiple localizations, etc. And when you have an update to your interface, you will have to redo this process, or at least for the affected screenshots. Automated screenshots have been able to solve most of these problems. There are tools like fastlane that enable us to automatically take screenshots of our app in all different variations we desire, all in a fraction of the time a person would take. The downside to this is that automating taking of screenshots takes away the uniqueness that helps in standing out from the crowd. In this article, we will use UI testing and Jetpack Compose to design our screenshots and automatically capture them using fastlane.
Before we start
- Get familiar with UI testing using compose here.
- Setup fastlane and go through the fastlane documentation on automating screenshots. (or use this tutorial)
Choreographing the screenshots
class MyComposeTest {

	@get:Rule
	val composeTestRule = createAndroidComposeRule<TestActivity>()

    @Rule
	 @JvmField val localeTestRule = LocaleTestRule()

    @Before
	fun init() {
		Screengrab
			.setDefaultScreenshotStrategy(
				UiAutomatorScreenshotStrategy()
			)
    }

    @Test
	fun simpleScreenshot() {
        composeTestRule.setContent {
            ScreenshotsTheme {
                App()
            }
        }
        composeTestRule.takeScreenshot("simpleScreenshot")
    }
}
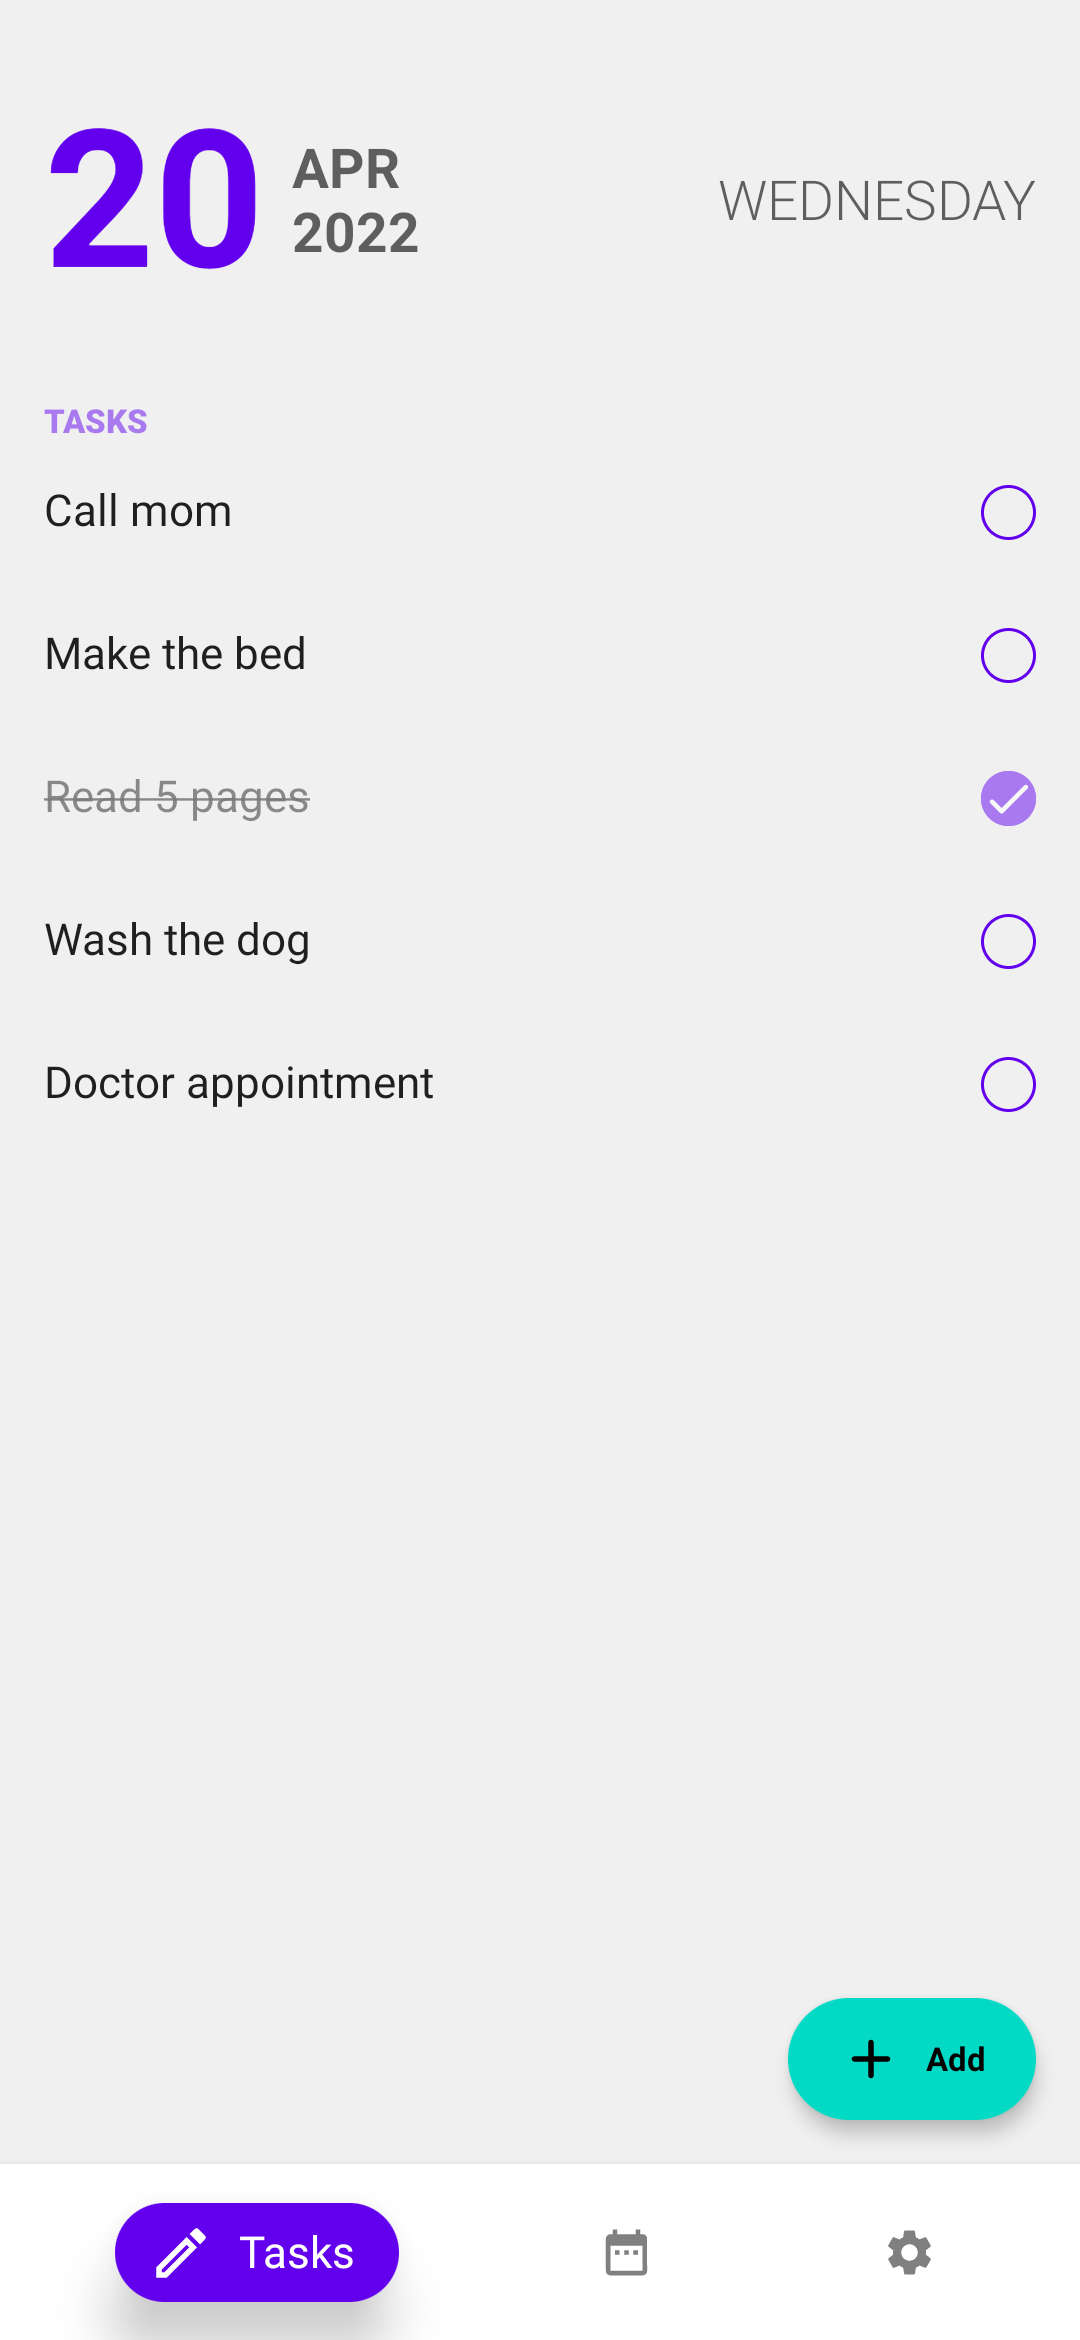
Here is how to take a simple screenshot. Before the test itself, we have some code for setting up fastlane screenshot tool. But the most important part is inside composeTestRule.setContent. In here, we can use any composable available when designing a normal app. For example, we can add some padding to the entire app and a shadow.
composeTestRule.setContent {
    ScreenshotsTheme {
        Box(
            modifier = Modifier
				.fillMaxSize()
                .padding(30.dp)
                .shadow(
	                elevation = 18.dp,
	                shape = RoundedCornerShape(10.dp))
                .clip(RoundedCornerShape(10.dp))
        ) {
            App()
        }
    }
}
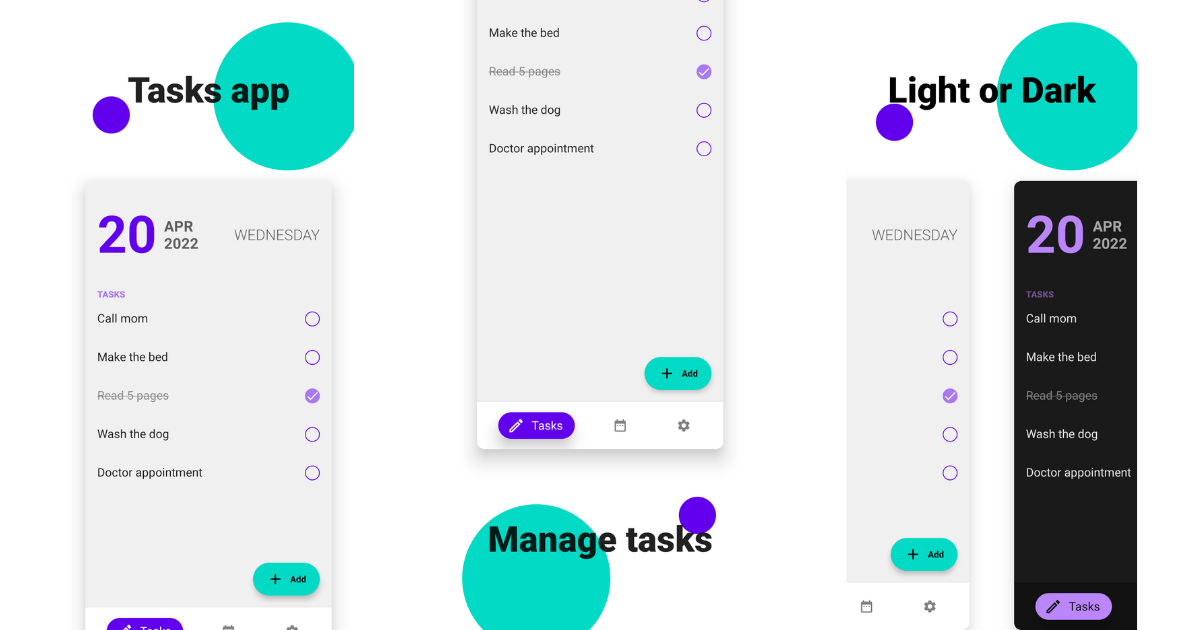
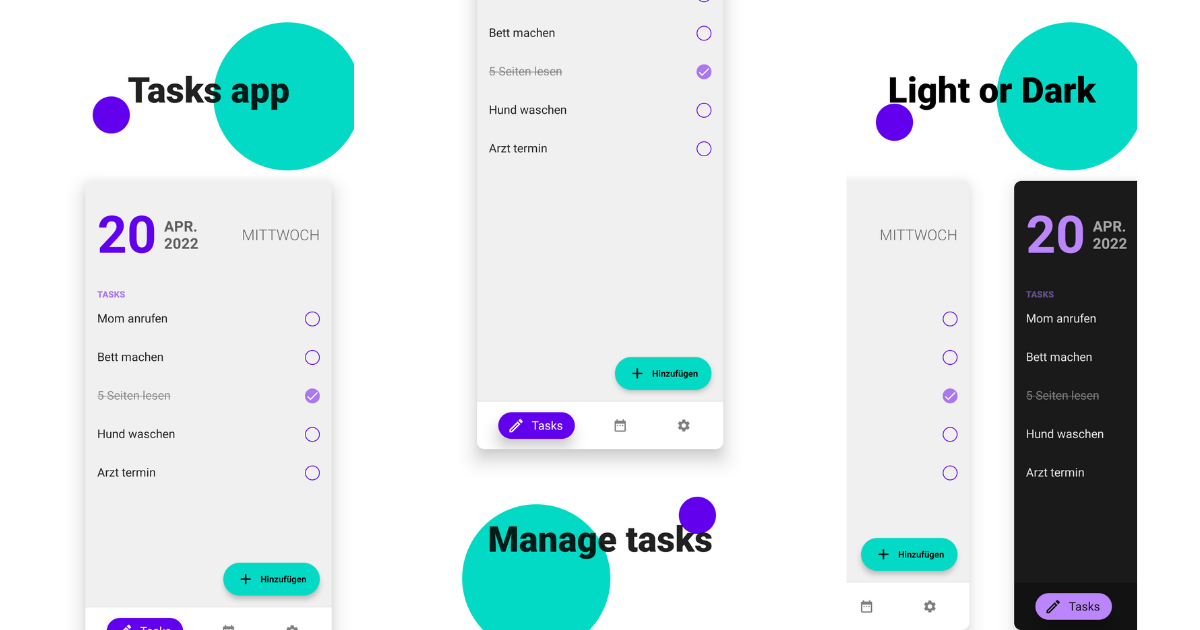
// card screenshot From here on, you are only limited by your imagination (or your designer's ;). You could add a title that explains the screenshot, add a background, highlight a feature, etc.
composeTestRule.setContent {
    ScreenshotsTheme {
        Box(
            Modifier
				.fillMaxSize()
                .background(Color.White)
        ) {

            Box(
                modifier = Modifier
					.align(Alignment.TopEnd)
                    .offset(x = 10.dp, y = 30.dp)
                    .size(200.dp)
                    .background(
	                    color = MaterialTheme.colors.secondary,
	                    shape = CircleShape
                    )
            )
            Box(
                modifier = Modifier
					.align(Alignment.TopStart)
                    .offset(x = 40.dp, y = 130.dp)
                    .size(50.dp)
                    .background(
	                    color = MaterialTheme.colors.primary,
	                    shape = CircleShape
                    )
            )
            Column(
                modifier = Modifier
					.verticalScroll(
						state = rememberScrollState(),
						reverseScrolling = false)
                    .fillMaxSize()
            ) {

                Text(
                    text = "Tasks app",
                    textAlign = TextAlign.Center,
                    fontSize = 48.sp,
                    fontWeight = FontWeight.Black,
                    modifier = Modifier
						.fillMaxWidth()
                        .padding(vertical = 94.dp)
                )

                Box(
                    modifier = Modifier
						.fillMaxWidth()
                        .height(640.dp)
                        .padding(horizontal = 30.dp)
                        .shadow(
	                        elevation = 18.dp,
	                        shape = RoundedCornerShape(10.dp))
                        .clip(RoundedCornerShape(10.dp))
                ) {
                    App()
                }
            }
        }
    }
}
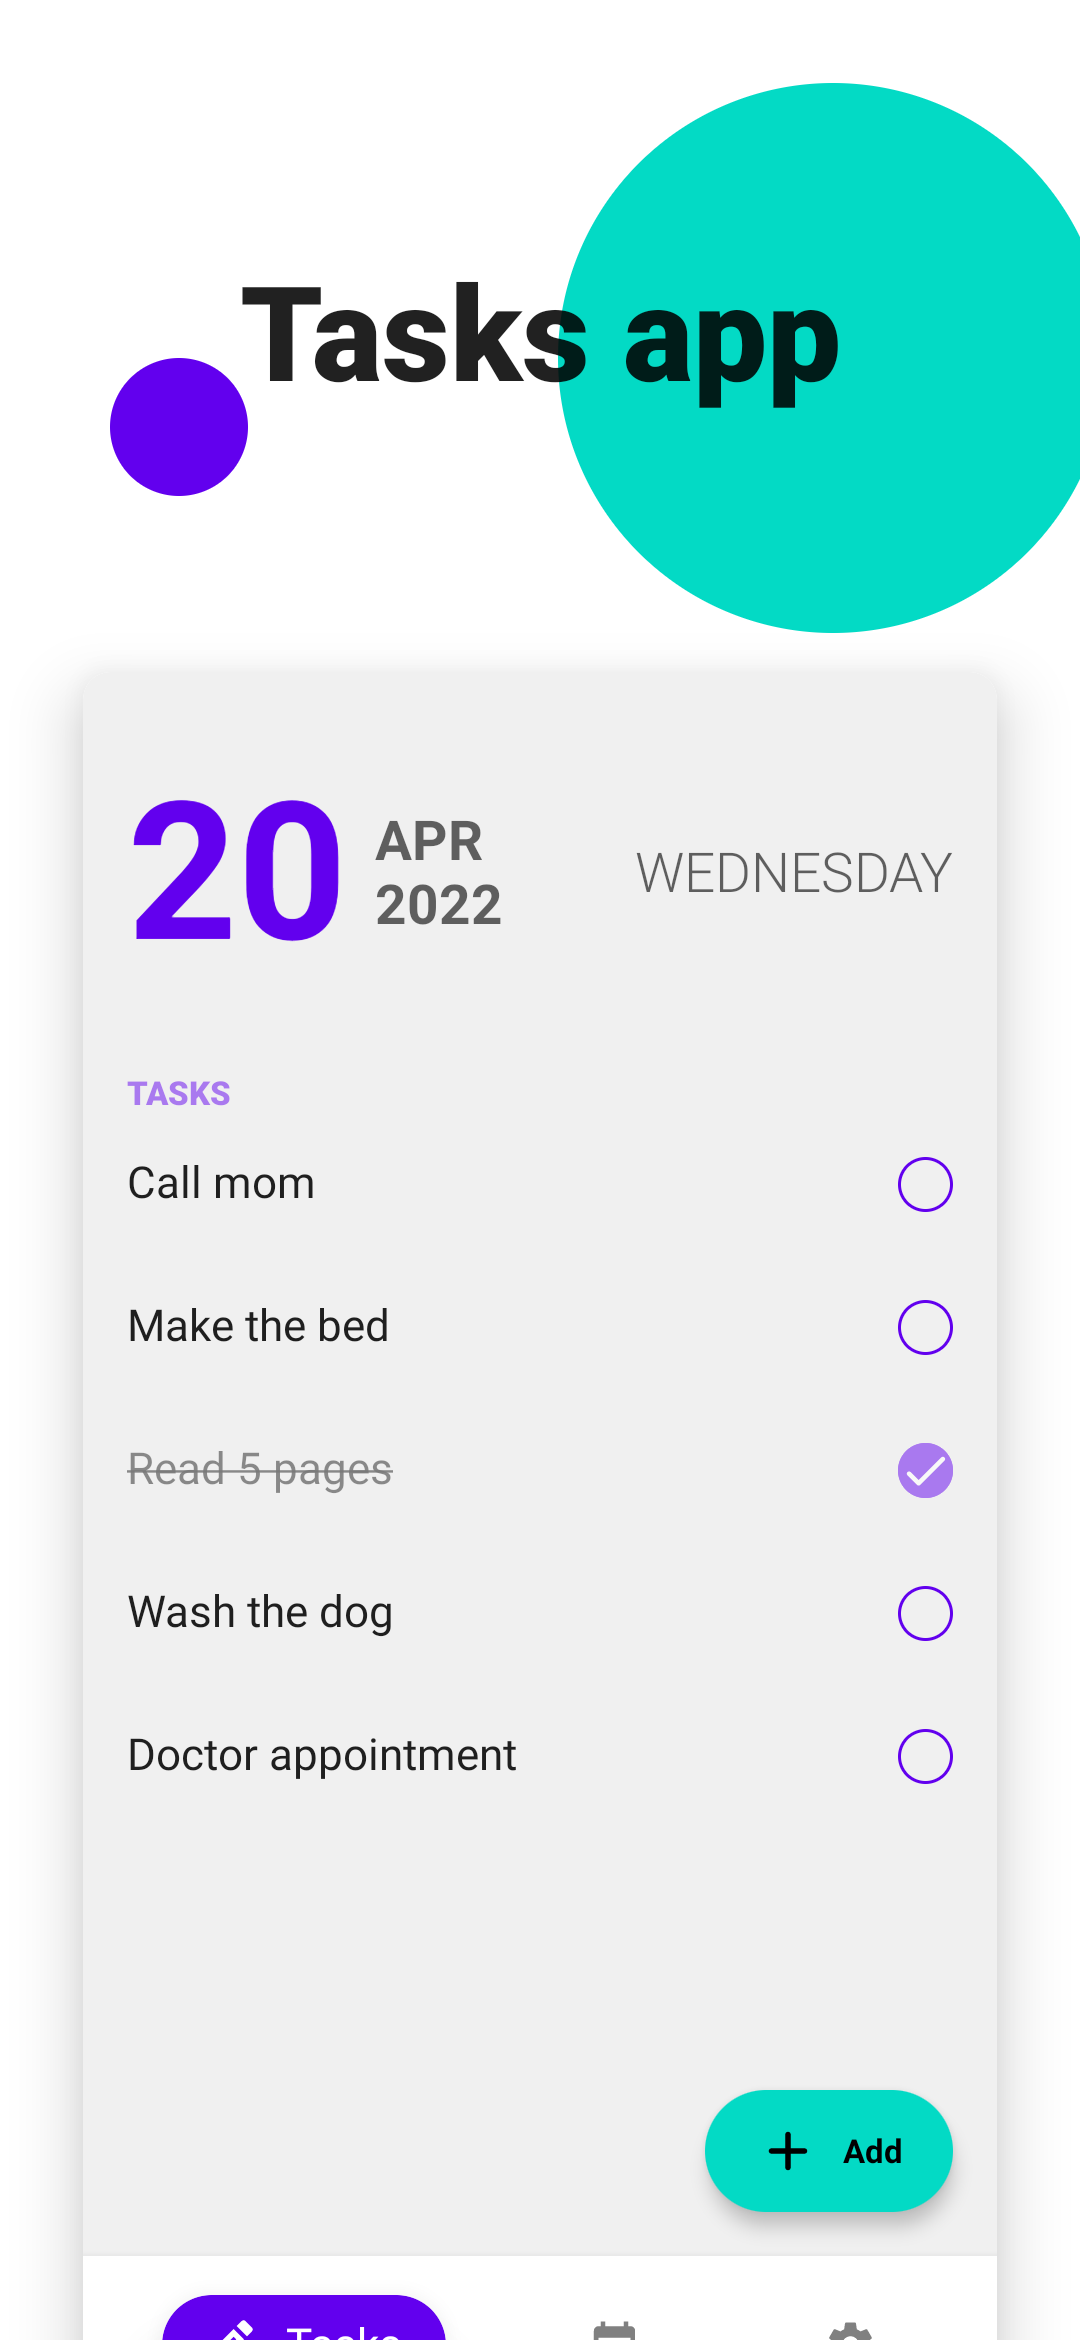
In this example, I have added some text above the app and offset it downwards. I also added a simple background using two boxes. You could also instantiate two versions of your app to display multiple versions of your app.
Row(...) {
    Box(
        ...
    ) {
        ScreenshotsTheme(darkTheme = false) {
            App()
        }

    }

    Box(
        ...
    ) {
        ScreenshotsTheme(darkTheme = true) {
            App()
        }

    }
}
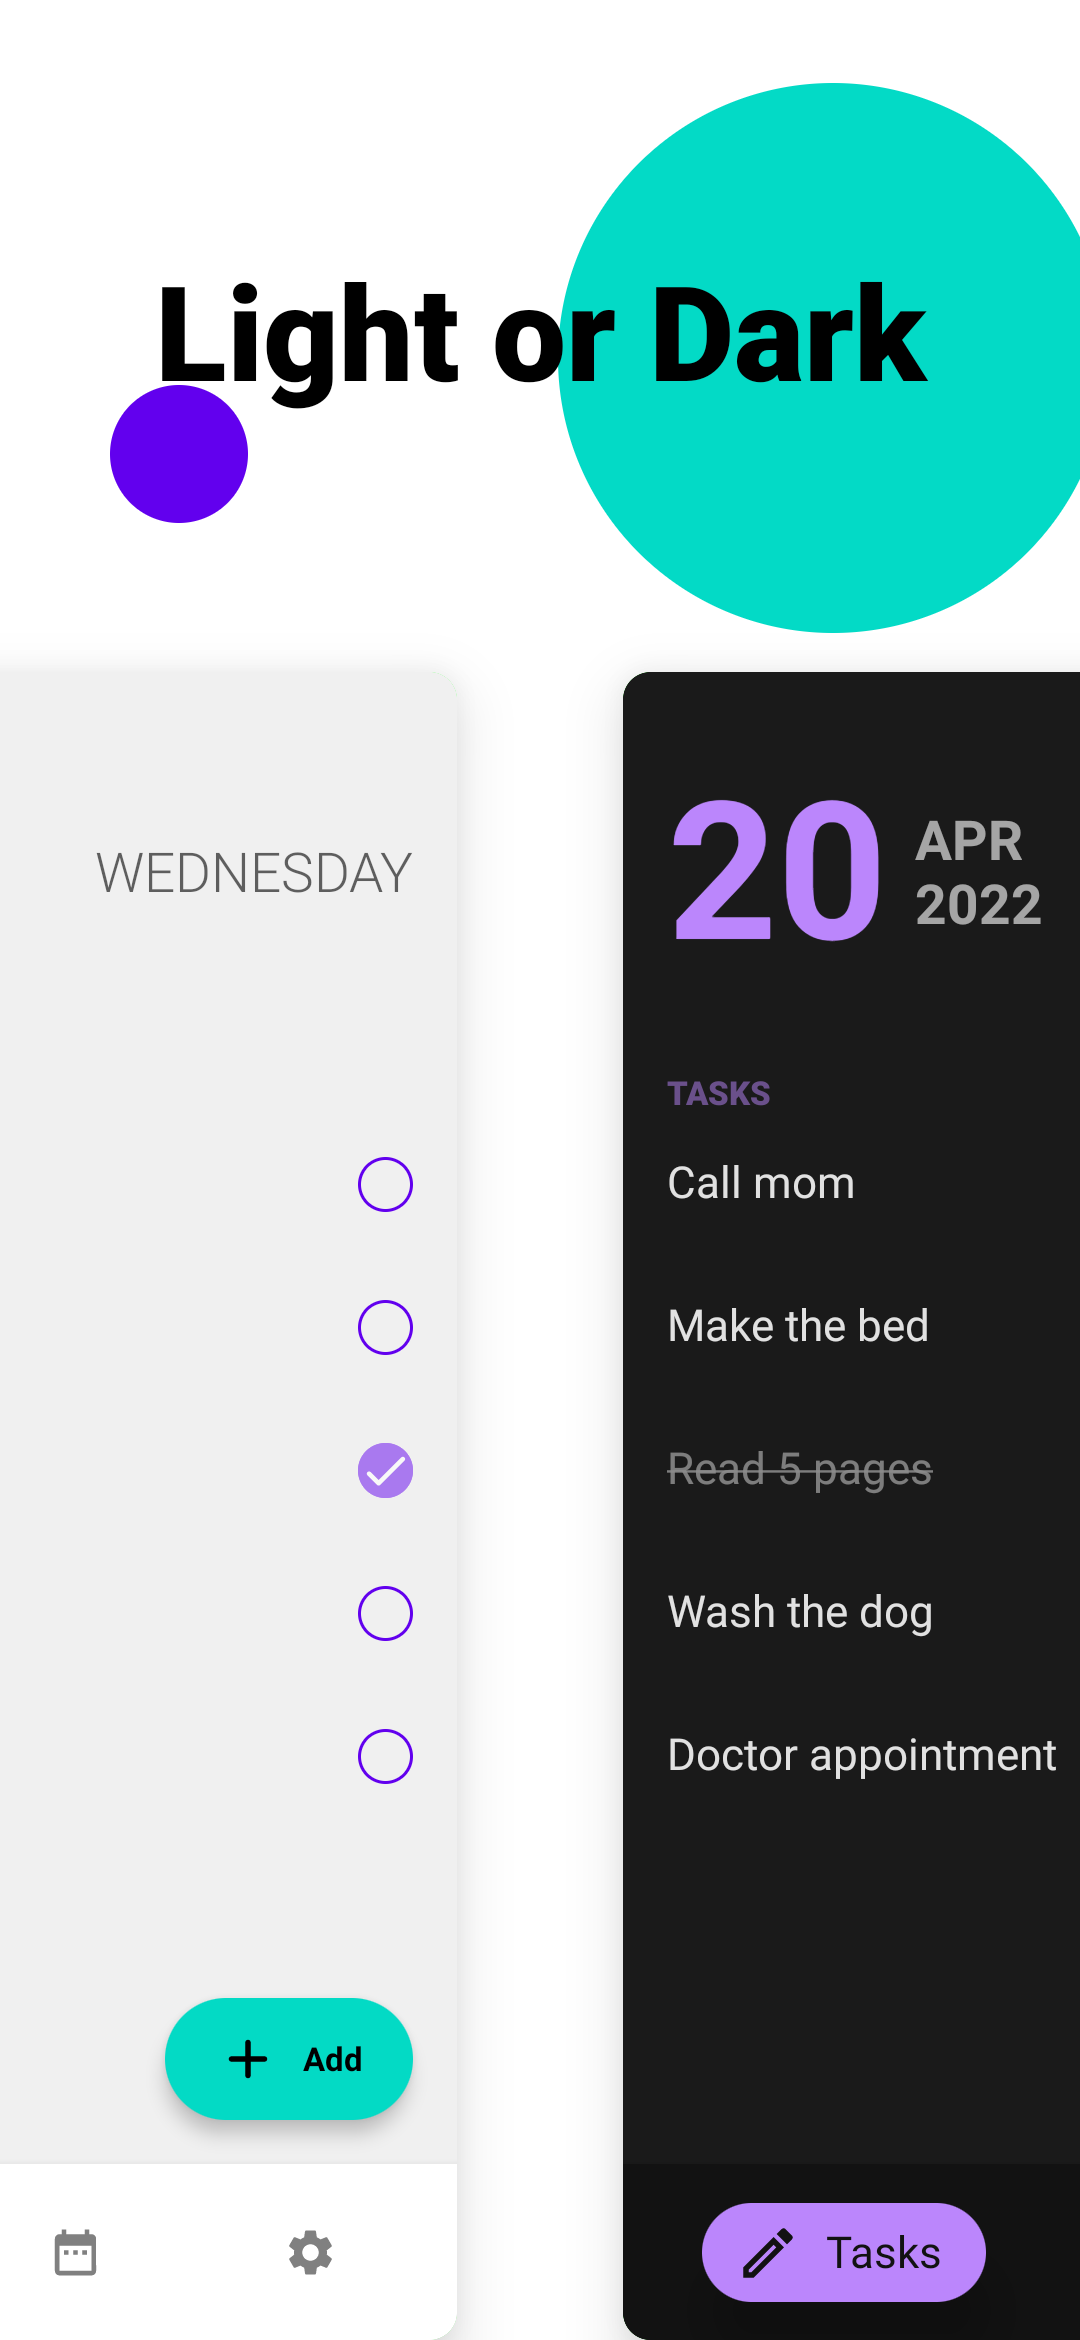
Here we have a dark and light version of the app side by side. Because App is just a composable, we can easily create two versions of it side by side. This is useful when showing different states of our application in a single screenshot.
Fastlane
For this sample, I am using fastlane to automatically run the UI tests and take and manage the screenshots. It can take screenshots in multiple languages if your app is localized and automatically upload them to the play store. For this sample, I just have a simple lane to make a clean build and take the screenshots.
lane :screenshots do
  gradle(task: "clean assembleDebug assembleAndroidTest")
  screengrab
end
I also have a file that defines where the apks are and which languages I would like to take screenshots of.
locales ['en-US', 'de-DE']
clear_previous_screenshots true
tests_apk_path 'app/build/outputs/apk/androidTest/debug/app-debug-androidTest.apk'
app_apk_path 'app/build/outputs/apk/debug/app-debug.apk'
test_instrumentation_runner 'androidx.test.runner.AndroidJUnitRunner'
So I can also automatically generate German screenshots with the same code.
How you set up the automation is up to you and your workflow. But the main point of this article was to demonstrate how Jetpack Compose enables us to be flexible with the designs of our screenshots. I hope with this you are able to create awesome screenshots. Source code for the sample project is here.
Thanks for reading and good luck!
Subscribe for UI recipes